Go Back
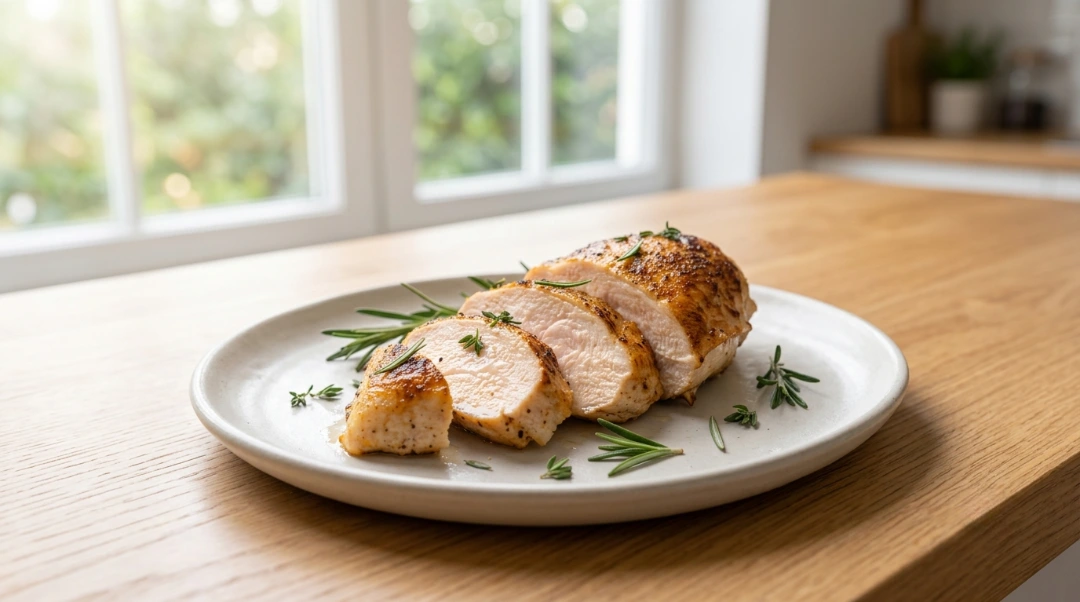
A perfectly cooked, sliced chicken breast is presented on a minimalist ceramic plate against a bright, airy kitchen window backdrop, serving as the ideal WPRM cover image for this juicy air fryer chicken breast recipe. The fresh rosemary garnish and the visible moisture on the sliced meat highlight the success of the air-frying technique, promising a tender and flavorful dining experience. This clean, professional composition is designed to catch the eye and invite readers to engage with the recipe details within your recipe card plugin.

Best Juicy Air Fryer Chicken Breast Never Dry

Perfectly juicy air fryer chicken breast with golden color and tender texture every time — no brine, no marinade required. The butterfly method and 160°F pull point are the two things that make this work consistently.
Prep Time 8 minutes
Cook Time 18 minutes
Total Time 28 minutes
Servings: 2 servings
Course: Dinner, Main Course, Meal Prep
Cuisine: American
Calories: 200

Ingredients
  

  • 2 pieces Boneless Skinless Chicken Breasts similar size if possible
  • 1 tbsp Olive Oil binds seasoning and protects surface
  • 1 tsp Smoked Paprika color and depth
  • 1 tsp Garlic Powder
  • ½ tsp Onion Powder
  • ½ tsp Brown Sugar optional creates caramelized color
  • ½ tsp Italian Seasoning
  • 1 tsp Salt
  • ½ tsp Black Pepper

Equipment

  • 1 Air Fryer any model basket or toaster oven style
  • 1 Instant Read Thermometer essential for hitting 160°F pull point
  • 1 Sharp Knife for butterflying
  • 1 Cutting Board
  • - Paper Towels for drying before seasoning
  • - Aluminum Foil for tent rest after cooking

Method
 

Prep
  1. Butterfly and Dry Butterfly each breast by slicing horizontally through the middle stopping before cutting all the way through, then opening flat. Alternatively pound to ¾ inch even thickness. Pat completely dry on both sides with paper towels.
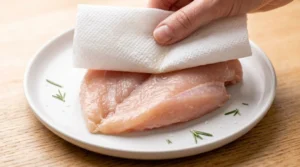
    A hand uses a paper towel to pat a raw, butterflied chicken breast dry on a plate, an essential technique for achieving the perfect juicy air fryer chicken breast. To ensure even cooking and optimal texture, butterfly each breast by slicing horizontally through the middle, stopping before cutting all the way through, and opening it flat, or alternatively pounding it to a 3/4 inch even thickness. Thoroughly drying the chicken on both sides is the secret to a professional, high-quality result that guarantees tender, succulent meat every single time you cook in your air fryer.
  2. Season Brush both sides with olive oil. Combine all dry rub ingredients. Rub evenly over all surfaces. Rest at room temperature 15 minutes for deeper seasoning penetration optional but worth it.
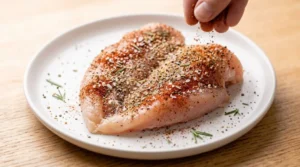
    A hand sprinkles a savory dry rub over a raw, butterflied chicken breast on a plate, a crucial step to creating a delicious, juicy air fryer chicken breast. To season perfectly, brush both sides of the chicken with olive oil, combine all your dry rub ingredients in a small bowl, and rub the mixture evenly over all surfaces. For deeper flavor penetration, let the seasoned chicken rest at room temperature for 15 minutes—this optional step is highly recommended for achieving the most flavorful and tender results in your air fryer.
  3. Preheat Preheat air fryer to 375°F for 3 minutes.
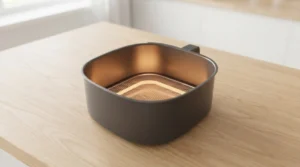
    An empty basket-style air fryer sits on a wooden kitchen counter, staged for preheating to create the ideal environment for cooking a juicy air fryer chicken breast. To ensure the best results, preheat your air fryer to 375°F for 3 minutes before adding your seasoned chicken. This quick and essential preheating step sets the stage for evenly cooked, tender, and succulent chicken, making your home-cooked meal taste like it came straight from a professional kitchen.
Cook
  1. First Side Place breasts in single layer — not touching. Cook at 375°F for 7 minutes.
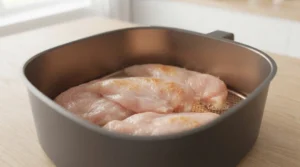
    Raw, seasoned chicken breasts are arranged in a single layer within an air fryer basket, ensuring they are not touching to allow for even airflow, which is a key step for a juicy air fryer chicken breast. Place the breasts in a single layer and cook them at 375°F for 7 minutes to begin the process. Following these precise initial cooking instructions is essential for achieving the perfect balance of tender, succulent meat and even heating that makes this easy recipe a reliable favorite for any meal.
  2. Flip and Finish Flip each breast. Cook according to size: small 5–6 oz: 4–5 min, medium 7–8 oz: 5–6 min, large 9–10 oz: 7–8 min. Check temperature at lower end of range.
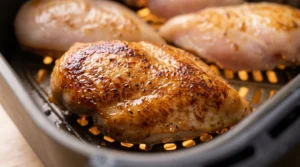
    To achieve the final stage of a truly juicy air fryer chicken breast, flip each breast over in the basket. The remaining cook time depends on the size of your chicken: small (5–6 oz) breasts need 4–5 minutes, medium (7–8 oz) breasts require 5–6 minutes, and large (9–10 oz) breasts take 7–8 minutes. Be sure to check the internal temperature at the lower end of these ranges to avoid overcooking. This careful approach ensures your chicken stays tender, moist, and flavorful, making it the perfect centerpiece for your next meal.
  3. Pull at 160°F Remove when internal temperature reads 160°F at thickest part. Carryover cooking during rest brings it to 163–165°F per USDA safe minimum cooking temperatures. Waiting for 165°F in the air fryer means the breast rests at 168–170°F — which causes dryness.
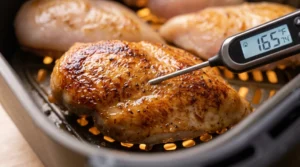
    A digital thermometer is inserted into the thickest part of a golden-brown chicken breast in an air fryer, an essential step for ensuring a perfectly juicy air fryer chicken breast. To achieve the best texture, remove the chicken when the internal temperature reads 160°F, as carryover cooking during the resting period will bring it to the USDA safe minimum of 163–165°F. Waiting for the thermometer to read 165°F while still in the air fryer causes the final temperature to reach 168–170°F during rest, which inevitably leads to dryness.
Finish
  1. Foil Tent Rest Place on plate and tent loosely with foil. Rest 5 minutes. Loose foil traps light steam to prevent surface drying without softening the exterior.
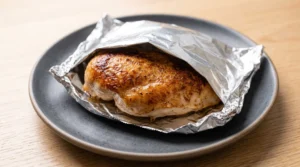
    A perfectly cooked, golden-brown chicken breast rests on a plate, loosely covered by a foil tent, which is a vital step for achieving a juicy air fryer chicken breast. To perform this step, place the cooked chicken on a plate and tent it loosely with aluminum foil for 5 minutes. This technique works because the loose foil traps just enough light steam to prevent the surface of the meat from drying out, while ensuring the exterior texture remains perfectly intact without becoming soft or soggy.
  2. Slice Against the Grain Slice at a diagonal against the muscle fibers. Cutting against the grain shortens the fibers in each slice and makes every bite noticeably more tender.
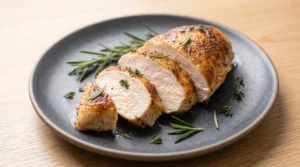
    A perfectly cooked, juicy air fryer chicken breast is sliced at a diagonal against the muscle fibers on a plate, garnished with fresh herbs. This technique of slicing against the grain is the final step to ensuring your chicken is as tender as possible, as it effectively shortens the muscle fibers in each slice. By cutting this way, you make every bite noticeably more tender, providing a professional finish to your meal that ensures the juiciness is enjoyed to its fullest potential.

Notes

Still coming out dry?
Check three things: breast was not butterflied so thickness was uneven, pulled at 165°F or higher in the air fryer, or temperature was too high. Butterfly plus 375°F plus 160°F pull is the combination that works.
Meal prep version?
Pull at 155°F instead of 160°F. Rests to 160°F and reheats to 165°F without drying out. Noticeably juicier on days 3 and 4.
No thermometer?
Use size-based time chart as a guide but check by pressing the center fully cooked breast feels firm with slight spring. Undercooked feels soft and squishy. Overcooked feels very firm and tight.
Storage?
Fridge: up to 4 days airtight, sliced for faster reheating. Reheat: air fryer 350°F for 3–4 minutes or stovetop medium-low covered with 1 tbsp water.
Freeze?
Freeze whole or sliced. Thaw overnight in fridge. Reheat at 350°F in air fryer or stovetop with a splash of water.