
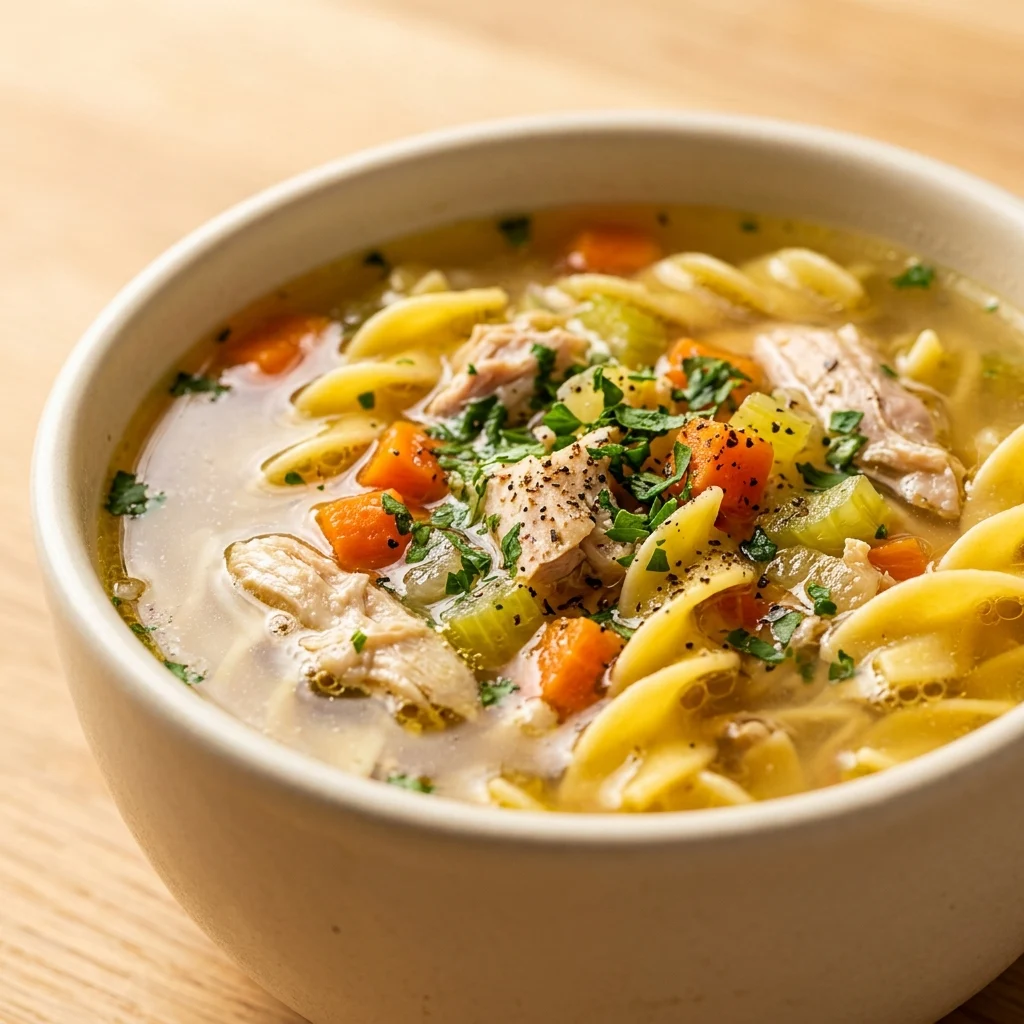
Best Homemade Chicken Soup From Scratch Winter Healing
Almost every one of the world’s cultures has a version of this soup known fondly in the United States as Jewish penicillin, it is the go-to comfort food for mothers the world over.
There is something that happens when you make chicken soup completely from scratch. The kitchen fills with a smell that is different from anything else not just good, but deeply reassuring. The kind of smell that makes a difficult day feel manageable.
Homemade versions beat canned every time. Use bone-in cuts for richer flavor, simmer gently not boil, and always skim foam early. Those three principles separate a deeply flavorful, collagen-rich broth from the “water soup” result that happens when chicken soup is rushed.
This is the complete from-scratch method whole chicken or leftover carcass, cold water start for maximum collagen extraction, proper foam skimming, and noodles cooked separately so they never turn to mush. Here is everything.
Why You’ll Love This Recipe
- Rich collagen broth cold water start and bone-in chicken extract maximum depth
- Never bland foam skimming, proper simmer, and umami booster explained
- Noodles never soggy cooked separately, added at serving
- Works with whole chicken or leftover carcass zero waste method
- Genuinely healing the science behind chicken soup and winter illness explained
The Healing Science What Research Actually Says
Chicken soup has a long history as a comfort food during colds and other illnesses. Research has explored several possible reasons people may find it soothing, including hydration, warmth, and potential effects of some soup components on inflammatory processes.
Warmth and hydration: A warm bowl of soup provides fluids and can be easier to eat when appetite is reduced. Warm liquids may also temporarily soothe a sore throat and help relieve the sensation of nasal congestion.
Chicken and broth components: Chicken and vegetables provide protein, nutrients, and flavor compounds that contribute to the soup’s nutritional value. Laboratory research has investigated whether chicken soup may influence certain inflammatory processes, but these findings should not be presented as proof that chicken soup treats or cures a cold or flu.
A practical sick-day food: The most reliable benefits are simple ones: soup provides fluid, sodium, energy, and protein in a warm, easy-to-eat form. It can be a comforting addition to supportive care while the body recovers.
Chicken soup is therefore best described as comforting and hydrating rather than a medical treatment. If symptoms are severe, persistent, or concerning, appropriate medical care should be sought.
Anti-inflammatory effect: A 2000 study at the University of Nebraska Medical Center found that chicken soup inhibited neutrophil chemotaxis the movement of white blood cells that cause inflammation. The researchers concluded this explained part of the soup’s ability to reduce cold symptoms. University of Nebraska chicken soup research
The Simmer vs Boil Science Why This Matters Most
Chicken soup fails when you ignore timing and fat control boiling chicken like pasta then wondering why the broth tasted off is one of the most common mistakes.
This is the single most important technique decision in the recipe.
What happens when you boil: Vigorous boiling agitates the proteins and fat in the broth constantly. The fat gets emulsified into the liquid producing a cloudy, slightly greasy broth with a flat flavor. The chicken itself becomes stringy and dry as the proteins tighten under high heat.
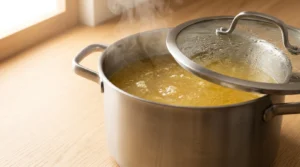
What happens when you simmer: A gentle simmer small bubbles breaking the surface occasionally, not a rolling boil keeps the fat and proteins separate. The fat rises to the surface where it can be skimmed. The broth stays clear and clean. The chicken stays tender because the proteins never tighten from excessive heat.
The visual guide:
- Rolling boil = wrong temperature
- Vigorous simmer (constant rapid bubbling) = slightly too hot
- Gentle simmer (lazy bubbles every few seconds) = exactly right
- No movement = too cold
Adjust the heat to maintain that lazy bubble this is the entire secret to a clear, deeply flavored broth.
The Cold Water Start Collagen Extraction Secret
Starting the chicken in cold water is a traditional stock-making technique that allows the ingredients to heat gradually. It also gives you time to monitor the surface as proteins rise and begin skimming before the broth reaches a vigorous boil.
As the chicken and connective tissue cook, collagen gradually breaks down into gelatin, contributing body and richness to the finished broth. A broth that becomes noticeably gelatinous when chilled is a useful visual sign that gelatin has developed during cooking.
The cold-water start is a useful technique for this recipe, but it should not be described as a guarantee of significantly greater collagen extraction than every hot-start method. The type and amount of bones, connective tissue, cooking time, temperature, and water ratio all affect the final broth.
About This Recipe
This homemade chicken soup from scratch was tested with whole chicken vs bone-in pieces vs leftover carcass, cold water start vs boiling water start, with and without foam skimming, three different noodle timing approaches, and with and without a small amount of umami booster. The method below produced the clearest broth, most tender chicken, and best overall flavor across every test.
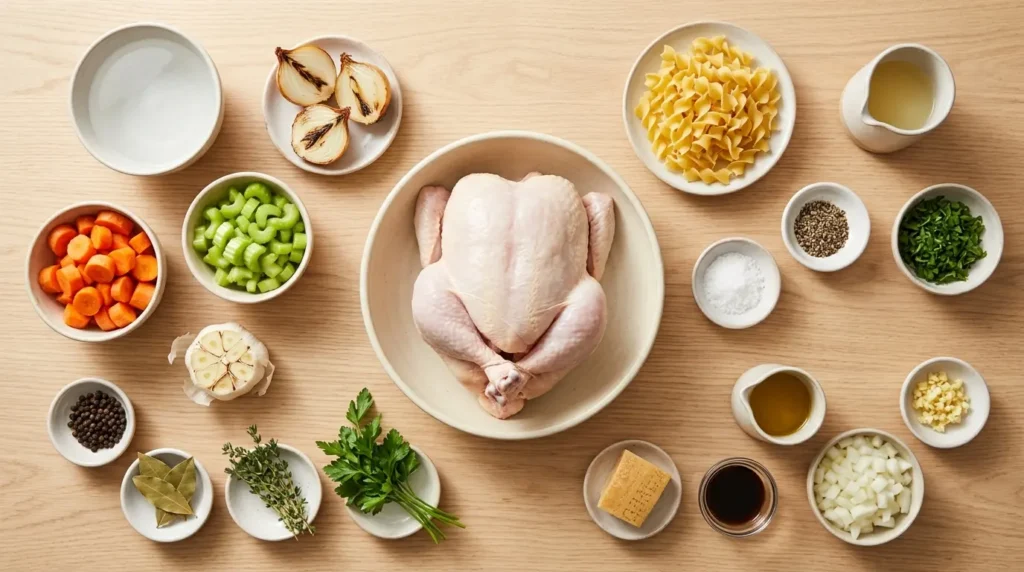
Ingredients
For the Broth (Stage 1):
- Whole chicken — 3.5 to 4 lbs (bone-in is essential for collagen-rich broth see method)
- Cold water — 10 to 12 cups (cold start not hot)
- Yellow onion — 1 large, halved (charring the cut side adds color and depth)
- Carrots — 3, roughly chopped
- Celery — 3 stalks, roughly chopped
- Garlic — 1 head, halved crosswise
- Black peppercorns — 1 tbsp
- Bay leaves — 2
- Fresh thyme — 4 sprigs (or 1.5 tsp dried)
- Fresh parsley stems — small handful (stems, not leaves leaves go in later)
The Umami Secret:
- Parmesan rind — 1 small piece (optional adds extraordinary depth)
- Soy sauce — 1 tbsp (the secret ingredient from the most-praised recipes adds savory depth without tasting like soy)
For the Soup (Stage 2):
- Olive oil — 1 tbsp
- Yellow onion — 1 medium, diced
- Carrots — 3 medium, cut into ½-inch rounds
- Celery — 3 stalks, sliced ½-inch thick
- Garlic — 3 cloves, minced
- Fresh thyme — 1 tsp
- Salt — 1.5 tsp (adjust to taste broth saltiness varies)
- Black pepper — ½ tsp
- Shredded chicken — from the cooked whole chicken (about 3 cups)
- Fresh parsley — 3 tbsp, chopped (added at the end heat destroys fresh parsley)
- Fresh lemon juice — 1 tbsp (the finishing touch that brightens everything)
Noodles or Rice (Cook Separately):
- Egg noodles — 8 Oz (cooked separately never in the soup)
- OR brown rice — 1 cup dry (cook separately, add at serving)
Ingredient Notes and Substitutions
Whole chicken vs bone-in pieces vs leftover carcass:
| Method | Flavor | Collagen | Time | Cost |
|---|---|---|---|---|
| Whole chicken | Excellent | High | 1.5 to 2 hours | Moderate |
| Bone-in thighs + drumsticks | Very good | Medium-high | 1 to 1.5 hours | Lower |
| Leftover roast chicken carcass | Deepest | Highest | 2 to 3 hours | Almost free |
| Rotisserie chicken | Good | Low | 45 minutes | Moderate |
Rotisserie chicken works but lacks the depth of from-scratch key fact worth knowing before deciding. For a winter healing soup when depth of flavor matters most, whole chicken or a leftover carcass is worth the extra time.
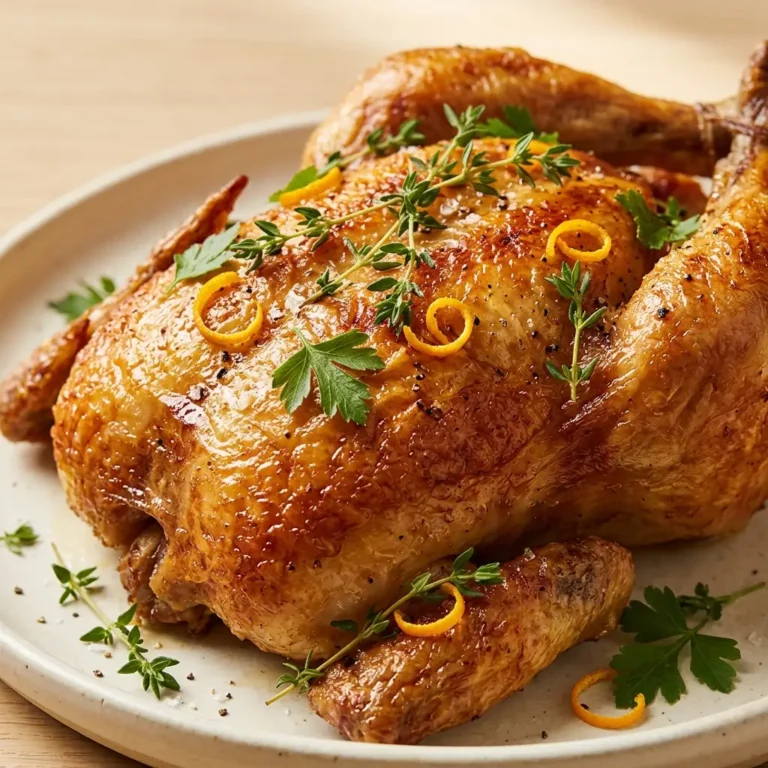
Leftover carcass method: After roasting a whole chicken (from Post 25 or Post 29), save the carcass. Break it into pieces to fit in a pot. Cover with cold water. Add the same aromatics as the broth stage. Simmer 2 to 3 hours. Using the bones and skin of a leftover whole chicken adds lots of collagen, plus it is a great way to actually use up all the meat on the chicken that might otherwise go to waste.
Soy sauce: One tablespoon of soy sauce adds remarkable savory depth without tasting like soy it is a professional kitchen trick that makes the broth taste more complex without any identifiable Asian flavor profile. Do not skip this it is the difference between a good broth and a great one.
Parmesan rind: A small piece of parmesan rind simmered in the broth adds glutamate the natural umami compound without any dairy flavor in the finished soup. This is a classic Italian technique that works beautifully in chicken soup.
Noodle type: Egg noodles are the classic choice wide, flat, slightly chewy. They cook in 6 to 8 minutes in salted boiling water. Rice or orzo pasta work equally well. Avoid thin pasta like angel hair or vermicelli they turn to mush too quickly.
Step-by-Step Instructions
Step 1: Char the Onion (Optional but Worthwhile)
Heat a dry skillet or hold a halved onion directly over a gas flame until the cut side is deeply charred almost burnt. This adds color and a slightly caramelized, smoky depth to the broth.
This technique is used in Vietnamese pho and Korean broths it adds a dimension of flavor that raw onion cannot produce. Takes 2 minutes and makes a noticeable difference.
Step 2: Cold Water Start
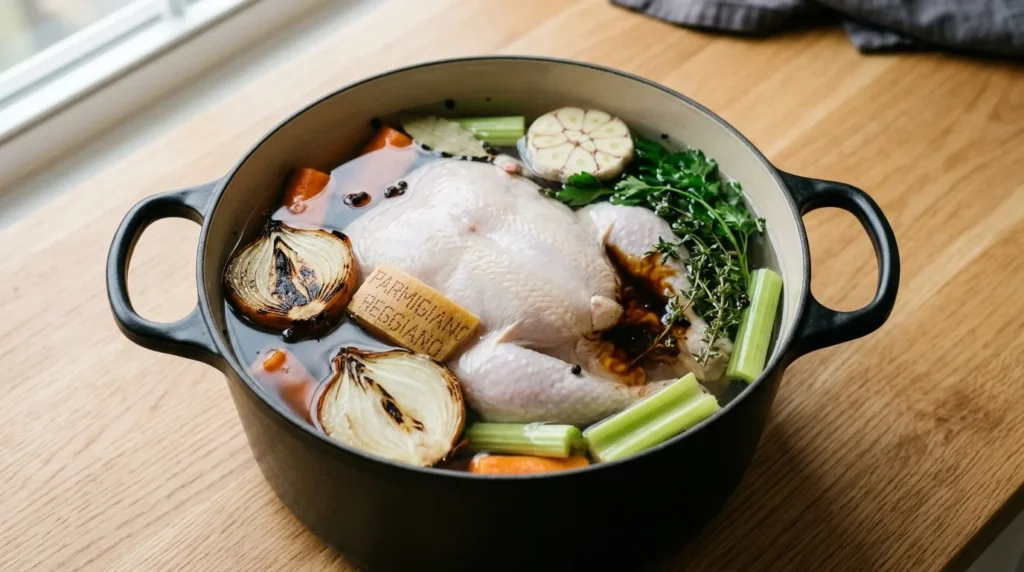
Place the whole chicken in a large pot. Pour cold water over enough to cover the chicken by 2 inches (10 to 12 cups). Add charred onion halves, roughly chopped carrots, celery, halved garlic head, peppercorns, bay leaves, thyme sprigs, parsley stems, and soy sauce.
Do not add salt yet. Salting at the broth stage draws out moisture from the vegetables before they can contribute flavor. Add salt to the finished soup in Stage 2.
If using a parmesan rind: add now.
Step 3: Bring to a Simmer Skim the Foam
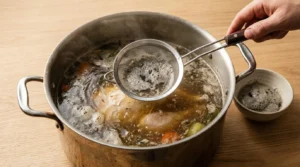
Bring to a boil over medium-high heat. As the water approaches boiling temperature, a grey-brown foam will rise to the surface. This foam is coagulated proteins and impurities from the chicken.
Begin skimming the foam with a large spoon or ladle as soon as it appears every 2 to 3 minutes for the first 15 minutes. This is the step most recipes mention in one sentence and move on from. It deserves more attention.
Why skimming matters: The foam contains bitter compounds that make broth taste flat and slightly unpleasant. A properly skimmed broth tastes noticeably cleaner and clearer than an unskimmed one. The difference is not subtle.
How long to skim: Continue until the foam stops rising usually after 15 to 20 minutes of skimming. Once the broth is running mostly clear at the surface, the skimming phase is complete.
Step 4: Reduce to a Gentle Simmer
Remove the whole chicken to a cutting board with tongs. Check the thickest part of the chicken with an instant-read food thermometer, avoiding contact with bone. The chicken should reach a minimum internal temperature of 165°F (74°C) before it is considered safely cooked.
Let the chicken cool briefly, then handle it carefully and remove the meat from the bones. Do not rely only on the meat pulling away from the bone, shredding easily, or the cooking time to determine whether the chicken is safely cooked.
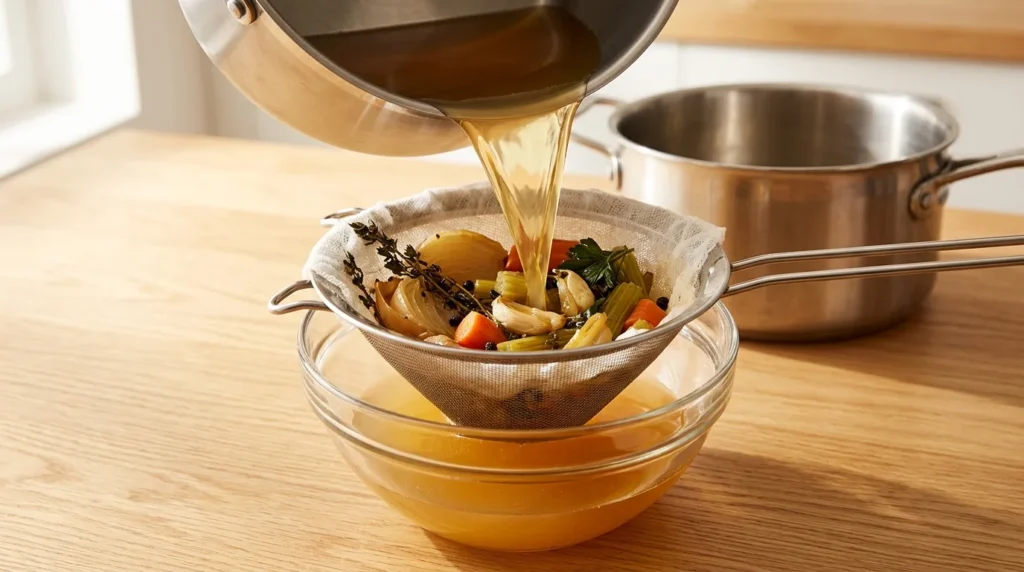
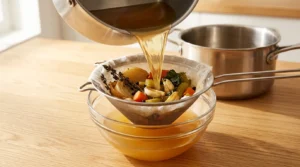
Pour the broth through a fine mesh strainer into a large bowl or second pot. Discard the cooked vegetables, peppercorns, herbs, and bones. Let the strained broth settle for 5 minutes and skim excess fat from the surface if desired.
Step 5: Remove Chicken and Strain the Broth
Remove the whole chicken to a cutting board with tongs. Let cool for 15 minutes.
Pour the broth through a fine mesh strainer into a large bowl or second pot discard the cooked vegetables, peppercorns, herbs, and any bones. The vegetables have given everything they have to the broth and are flavorless at this point.
Let the strained broth settle for 5 minutes. Skim the fat from the surface with a spoon or refrigerate overnight and lift the solidified fat disc off the top the next day. A de-fatted broth has a cleaner flavor.
Taste the broth. It should be deeply savory with noticeable body. If it tastes flat: simmer uncovered for 15 more minutes to concentrate.
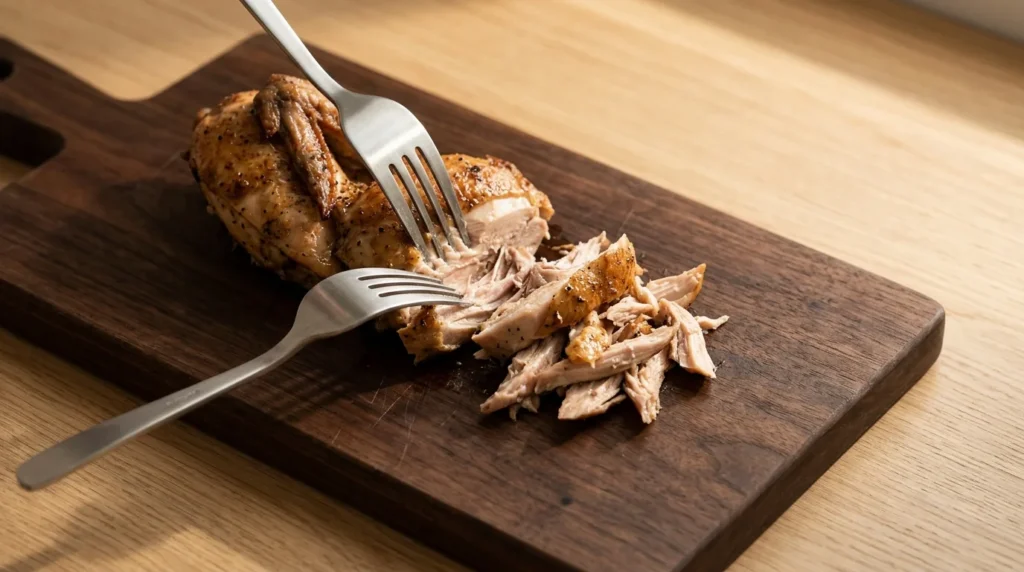
Step 6: Shred the Chicken
Remove all meat from the chicken carcass breast, thigh, drumstick, and any small pieces. Discard skin (it has given its fat and flavor to the broth), bones, and cartilage.
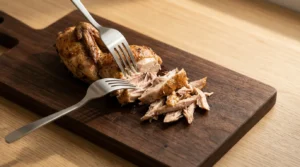
Shred or dice the meat into bite-sized pieces. A whole 3.5 lb chicken yields approximately 3 cups of shredded meat enough for a generous 6-serving soup.
Step 7: Build the Soup (Stage 2)
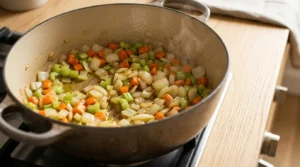
In the same large pot (cleaned) or directly in the strained broth, heat olive oil over medium heat. Add diced onion, sliced carrots, and sliced celery. Cook 5 to 6 minutes until softened this second sauté of fresh vegetables produces a brighter, more textured vegetable presence than the vegetables that cooked into the broth.
Add minced garlic and thyme. Stir 45 seconds.
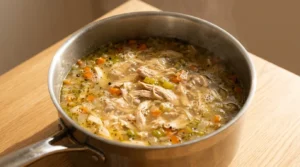
Pour the strained broth back into the pot. Add shredded chicken. Bring to a gentle simmer. Cook 10 to 15 minutes until the vegetables are tender but still have slight bite not mushy.
Season with salt and pepper. Start with 1 tsp salt taste, then add more. The saltiness of the broth varies based on the chicken and the soy sauce never add all the salt at once.
Step 8: Cook Noodles Separately
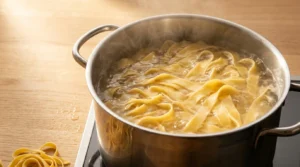
Bring a separate pot of heavily salted water to a boil. Cook egg noodles according to package directions until just al dente slightly firmer than fully cooked. Drain and toss with a small drizzle of olive oil to prevent sticking.
The critical rule: Never cook noodles in the soup.
Noodles cooked directly in the soup absorb the broth, swell, and turn to mush. By the next day, the noodles have absorbed so much broth that the soup becomes thick and starchy. Cooking separately means the soup stays clear and the noodles stay tender for the first bowl and the fourth.
Step 9: Finish and Serve
Remove from heat or reduce to lowest setting.
Add fresh lemon juice stir in just before serving. Lemon adds a great depth of flavor that brightens the whole bowl the soup tastes noticeably more vibrant with it than without.
Add chopped fresh parsley. Heat destroys fresh parsley color and flavor it goes in off heat only.
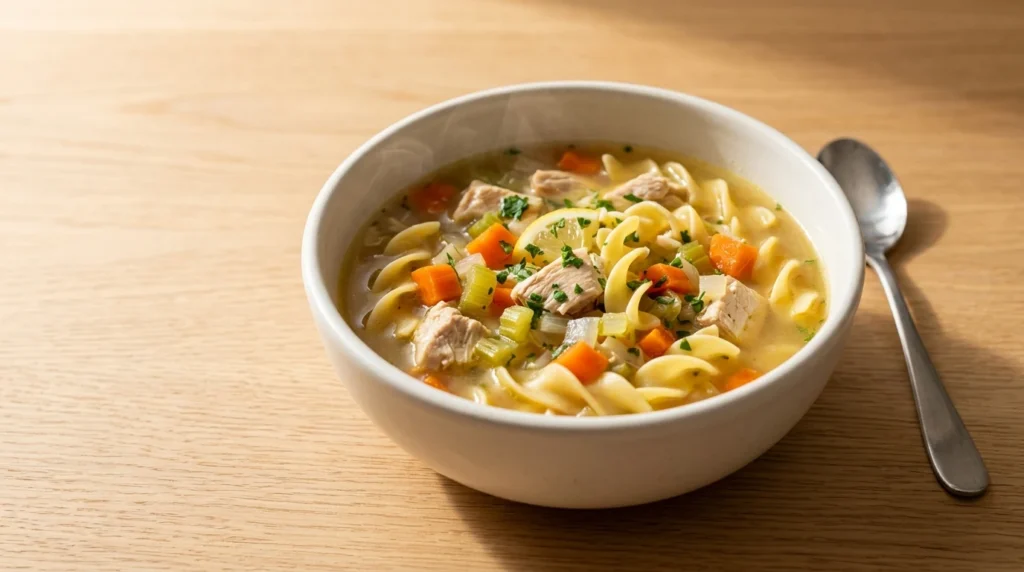
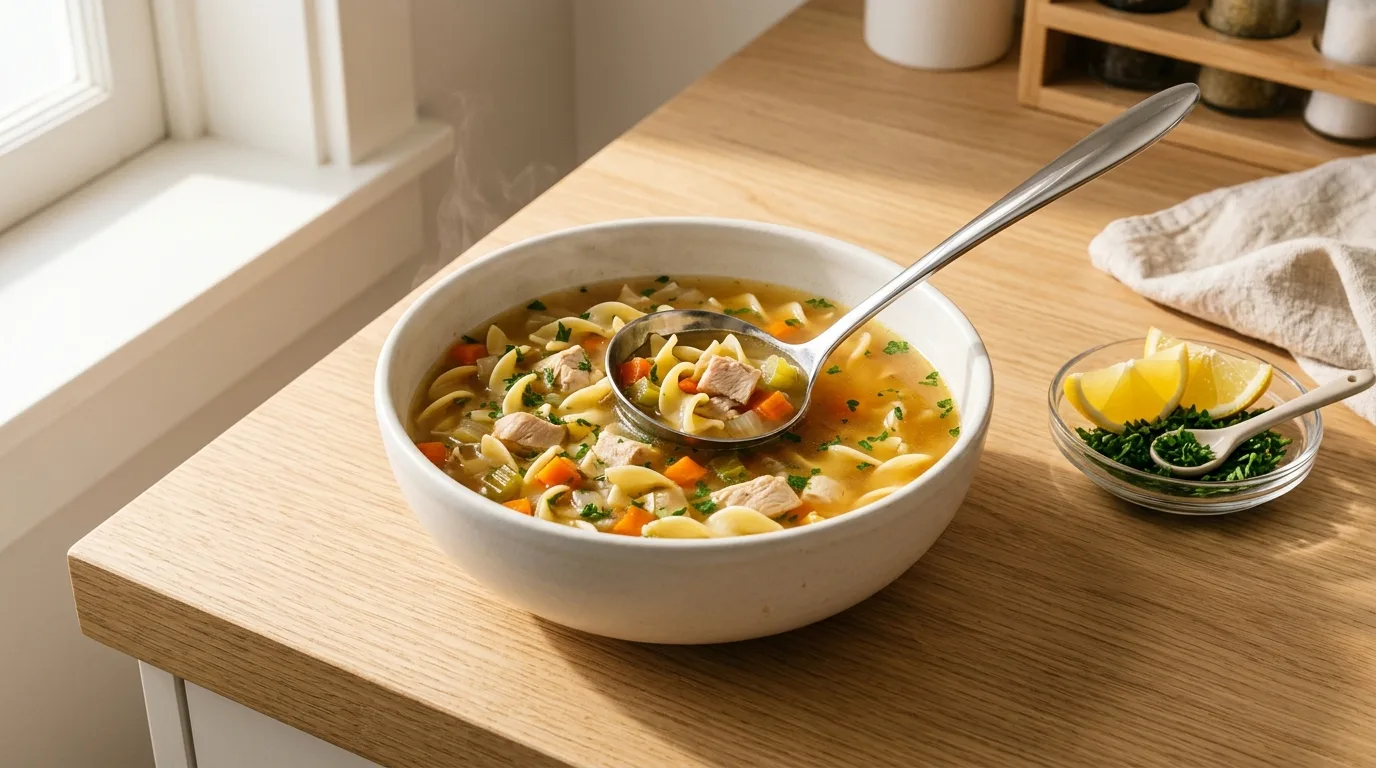
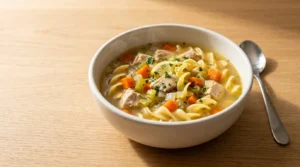
To serve: ladle soup into bowls. Add a portion of cooked noodles to each bowl. The noodles go into the bowl, not back into the pot.
What Went Wrong in Early Testing
Batch 1: Started with boiling water instead of cold.
The foam appeared immediately in large quantities and the exterior chicken proteins seized. Despite skimming, the broth was slightly cloudy and noticeably less rich than the cold-start version. Cold water start on every subsequent batch.
Batch 2: Cooked noodles directly in the soup.
The soup was perfect at lunch. By dinner the noodles had absorbed nearly all the broth what remained was a thick, starchy, over-noodled pot rather than a broth-rich soup. Separated noodles permanently from that point on.
Batch 3: Boiled the broth throughout instead of simmering.
The broth was cloudy, slightly greasy at the surface, and the chicken had a stringy, dry texture despite being technically cooked. Reduced to a lazy simmer on the next batch completely different result in clarity and texture.
Leftover Roast Chicken Carcass Method
Using the carcass from a leftover whole chicken to make broth is something to do with gusto at least once a week it is a wholesome process that uses up things that might otherwise go to waste while creating something that feels exciting to eat.
This is the zero-waste method that produces the deepest broth of all three approaches.
After serving the roast chicken from Post 25 or Post 29, collect:
- The carcass (bones, any remaining cartilage, the backbone)
- Any drippings remaining in the pan
- The aromatics from the cavity (lemon, garlic, herbs they still have flavor)
Break the carcass into pieces to fit in the pot. Cover with cold water. Add fresh aromatics. Simmer 2 to 3 hours longer than whole chicken because bones with less meat need more time to release collagen.
The resulting broth is remarkably rich it will fully gel when refrigerated, which is the sign of maximum collagen extraction.
Cost: Almost free. The carcass would otherwise go in the trash.
Noodle and Grain Options
| Option | Cook Time | Protein Added | Best For |
|---|---|---|---|
| Egg noodles (wide) | 6 to 8 min | 4g per serving | Classic chicken noodle |
| Orzo pasta | 8 to 10 min | 5g per serving | Lighter texture |
| Brown rice | 35 to 40 min | 3g per serving | Heartier, more filling |
| White rice | 18 to 20 min | 2g per serving | Easiest to digest when sick |
| Farro | 25 to 30 min | 4g per serving | Most fiber |
| No noodles/grain | — | — | Paleo, keto, low carb |
All options cooked separately in salted water never in the soup.
The Budget Comparison
Based on average US grocery prices, a realistic cost breakdown for homemade chicken soup: whole chicken approximately $8 to $10, vegetables $3, total roughly $12 to $15 for 6 to 8 servings. Compare that to takeout soups at $8 to $12 each or canned alternatives at similar price with lower quality the value of homemade becomes clear.
| Option | Cost Per Serving | Flavor | Nutrition |
|---|---|---|---|
| Homemade from scratch | $1.50 to $2.50 | Best | Highest |
| Canned chicken noodle | $1.00 to $1.50 | Adequate | Lower |
| Restaurant chicken soup | $8 to $15 | Variable | Unknown |
| Rotisserie chicken shortcut | $2.00 to $3.00 | Good | Medium |
Homemade wins on flavor and nutrition every time. Making your own also lets you avoid preservatives and excess sodium found in many commercial options.
Variations
Classic Chicken Noodle: The base recipe with wide egg noodles. The one everyone knows. Add 1 tsp of dried dill to the soup stage for the flavor that makes this taste like grandmother’s kitchen.
Chicken and Rice: Substitute white rice for noodles cook separately and add at serving. White rice is the most easily digestible grain, making this the best option when actually sick.
Lemon Chicken Orzo: Increase lemon juice to 2 tbsp. Add the zest of 1 lemon. Use orzo instead of noodles. Bright, vibrant, excellent when fighting a cold.
Healing Ginger Chicken Soup: Add jalapeño and ginger to the broth for unexpected depth of flavor both add great complexity and have natural anti-inflammatory properties. Add 1 inch fresh ginger (sliced) to the broth stage and 1 jalapeño (halved) for the last 30 minutes.
Creamy Chicken Soup: After building the soup in Stage 2, whisk together ¼ cup flour and ½ cup cold broth. Stir into the simmering soup. Add ½ cup heavy cream. Stir until thickened. Rich, velvety, excellent with biscuits.
Chicken Tortilla Soup Variation: Add 1 can diced tomatoes, 1 can black beans, 1 tsp cumin, and 1 tsp chili powder to Stage 2. Serve with tortilla strips, avocado, and lime. Completely different dish, same base broth.
What to Serve With
- Best Slow Cooker Chicken and Dumplings — another deeply comforting winter chicken dish
- Best Creamy White Chicken Chili — the spicier winter chicken bowl
- Best Whole Roast Chicken — Save the Carcass — roast Sunday, soup Monday
- Crusty sourdough bread for dunking into the broth
- Simple green salad something light alongside the rich soup
- Warm dinner rolls classic pairing for chicken noodle soup
- Crackers for the sick-day version when nothing else sounds good
Storage and Reheating
Reheat (stovetop): Reheat over medium heat, stirring occasionally, until the soup and chicken reach 165°F (74°C) internally. Add a little broth or water if the soup has thickened. Avoid prolonged vigorous boiling because it can affect texture.
Reheat (microwave): Cover loosely and heat in short intervals, stirring between intervals to distribute heat evenly. Continue heating until the soup and chicken reach 165°F (74°C) internally.
Reheat (microwave): Cover with damp paper towel. Medium power for 2 minutes, stir, full power for 60 seconds. Effective for individual servings. USDA food safety guidelines for soup storage
Freeze (broth only): Freeze broth in suitable portions for best quality. Leave enough headspace for expansion. Thaw in the refrigerator and reheat thoroughly before serving.
Freeze (assembled soup, without noodles): For best texture, freeze the soup base with chicken and vegetables without the noodles. Thaw in the refrigerator and reheat to 165°F (74°C). Cook fresh noodles separately when serving.
Do not freeze with noodles: For better texture, freeze the soup base separately and add freshly cooked noodles after reheating.
Best Homemade Chicken Soup From Scratch
Ingredients
Equipment
Method
- Cold Water Start Place whole chicken in large pot. Cover with cold water 10 to 12 cups. Add charred onion, carrots, celery, garlic, peppercorns, bay leaves, thyme, parsley stems, soy sauce, and parmesan rind if using. Do not add salt yet.
- Skim the Foam Bring to a boil over medium-high heat. As water heats, grey foam rises. Skim every 2 to 3 minutes for the first 15 to 20 minutes until foam stops rising. This is not optional skimming produces a dramatically cleaner broth.
- Gentle Simmer Reduce heat to low. Maintain a lazy simmer small bubbles occasionally breaking the surface, never a rolling boil. Partially cover lid slightly ajar. Simmer 1.5 to 2 hours until chicken falls off the bone easily.
- Remove Chicken and Strain Remove chicken to cutting board. Pour broth through fine mesh strainer discard spent vegetables. Skim fat from surface. Taste broth deeply savory with good body.
- Shred Chicken Let chicken cool 15 minutes. Remove all meat from bones. Discard skin, bones, cartilage. Shred into bite-sized pieces about 3 cups.
- Sauté Fresh Vegetables In same cleaned pot over medium heat, cook diced onion, carrots, and celery in olive oil for 5 to 6 minutes until softened. Add garlic and thyme for 45 seconds.
- Combine and Simmer Add strained broth back to pot with shredded chicken. Bring to gentle simmer. Cook 10 to 15 minutes until vegetables are tender with slight bite. Season with salt and pepper taste carefully before adding more.
- Cook Noodles Separately Boil heavily salted water in separate pot. Cook egg noodles until just al dente. Drain. Toss with small drizzle of olive oil to prevent sticking. Never cook noodles in the soup they absorb broth, turn mushy, and make leftovers dense.
- Finish and Serve Remove soup from heat. Add fresh lemon juice and fresh parsley off heat both go in last to preserve brightness and color. Ladle soup into bowls. Add noodle portion to each bowl. Serve immediately.
Notes
Nutrition Info (per serving, approximately 1.5 cups soup with noodles)
| Nutrient | Amount |
|---|---|
| Calories | 312 |
| Protein | 28g |
| Total Fat | 8g |
| Saturated Fat | 2g |
| Carbohydrates | 32g |
| Fiber | 3g |
| Sugar | 4g |
| Sodium | 680mg |
Nutrition information is an estimate and varies significantly depending on the chicken size, amount of fat skimmed, noodle portion, and specific brands used. Data sourced from USDA FoodData Central.
FAQs
Q: How long does homemade chicken soup from scratch take?
A: The broth stage takes 1.5 to 2 hours of simmering with a whole chicken. The soup-building stage takes 20 to 25 minutes. Total active time is about 45 minutes the broth simmers largely unattended. Using a leftover chicken carcass extends the broth time to 2 to 3 hours but requires even less attention. Using bone-in pieces instead of a whole chicken reduces broth time to 60 to 75 minutes.
Q: Why does my homemade chicken soup taste bland?
A: Usually one of three causes boiling instead of simmering (disperses fat into the broth, creates flat flavor), not skimming foam (bitter compounds remain), or under-seasoning (salt goes in the soup stage, not the broth stage taste carefully and adjust). The soy sauce addition and a squeeze of fresh lemon at the end are the two finishing touches that turn a flat soup into a deeply flavored one.
Q: Why should noodles be cooked separately from chicken soup?
A: Noodles cooked directly in the soup absorb the broth continuously they swell, soften, and eventually turn to mush. The starch they release also makes the broth cloudy and thick. Cooking separately in salted water and adding to individual bowls at serving keeps the broth clear and the noodles tender from the first bowl to the last.
Q: What is the difference between chicken soup from scratch and using rotisserie chicken?
A: Depth of flavor and nutrition. Rotisserie chicken produces a good soup quickly about 45 minutes. Whole chicken cooked from scratch produces significantly richer broth with more collagen and a more complex flavor from the bones, cartilage, and skin cooking slowly for 2 hours. The broth from a whole chicken will gel when refrigerated a sign of collagen richness that rotisserie broth rarely achieves.
Q: Does homemade chicken soup actually help when you’re sick?
A: Chicken soup can be a comforting source of fluids, warmth, sodium, and easily eaten food when you are feeling unwell. Some research has investigated possible effects of chicken soup on inflammation and cold symptoms, but it should not be described as a treatment or cure for an illness. Warm liquids may also temporarily help soothe a sore throat or relieve nasal congestion. Chicken soup can be part of supportive care, but it does not replace appropriate medical treatment when needed.
Q: What is the white foam when making chicken soup and should I skim it?
A: The foam is coagulated proteins and blood from the chicken it appears as the water heats toward a boil. Skimming it produces a noticeably cleaner, clearer, better-tasting broth. Skipping it leaves bitter compounds that make the broth taste flat. Skim with a large spoon every 2 to 3 minutes for the first 15 to 20 minutes until the foam stops rising.
About the Author
Written by a home cook who makes chicken soup from scratch through every winter testing broth methods, skimming techniques, noodle timing, and broth boosters across multiple batches until landing on the cold water start, gentle simmer, and separate noodle method that produces the deepest, most healing result consistently.
Would I Make This Again?
Every winter at least once a month from November through March, and whenever anyone in the household is sick.
The cold water start was adopted after a side-by-side test where two pots of chicken soup were started simultaneously one from cold, one from boiling. The difference in broth clarity and richness was visible before either pot was tasted. The cold start broth was noticeably more golden, more viscous, and deeper in flavor. The separate noodle rule became permanent after one too many leftover soups where noodles had absorbed every drop of broth and the leftovers were a dense, starchy mass. The soy sauce addition was discovered after reading the recipe notes on one of the most-praised chicken soup recipes online one tablespoon, undetectable as soy, but the broth tasted noticeably more complex.
Homemade chicken soup from scratch is not a Sunday project it is a deeply satisfying 45 minutes of active work that fills the kitchen with the right smell and produces something that canned soup genuinely cannot replicate.
Final Note
Rich, golden, collagen-rich broth with tender chicken, fresh vegetables, and perfect noodles the cold water start, gentle simmer, foam skimming, soy sauce depth, lemon at the end, and noodles cooked separately are what make this genuinely the best homemade chicken soup from scratch.
Cold water start, skim the foam, lazy simmer for 2 hours, fresh vegetables in Stage 2, separate noodles, lemon off heat. That is the whole method.
Made this? Save this recipe before cold and flu season and drop a comment below. Whole chicken or leftover carcass, and which noodle did you go with? Pin this for the first sick day this winter.


One Comment