
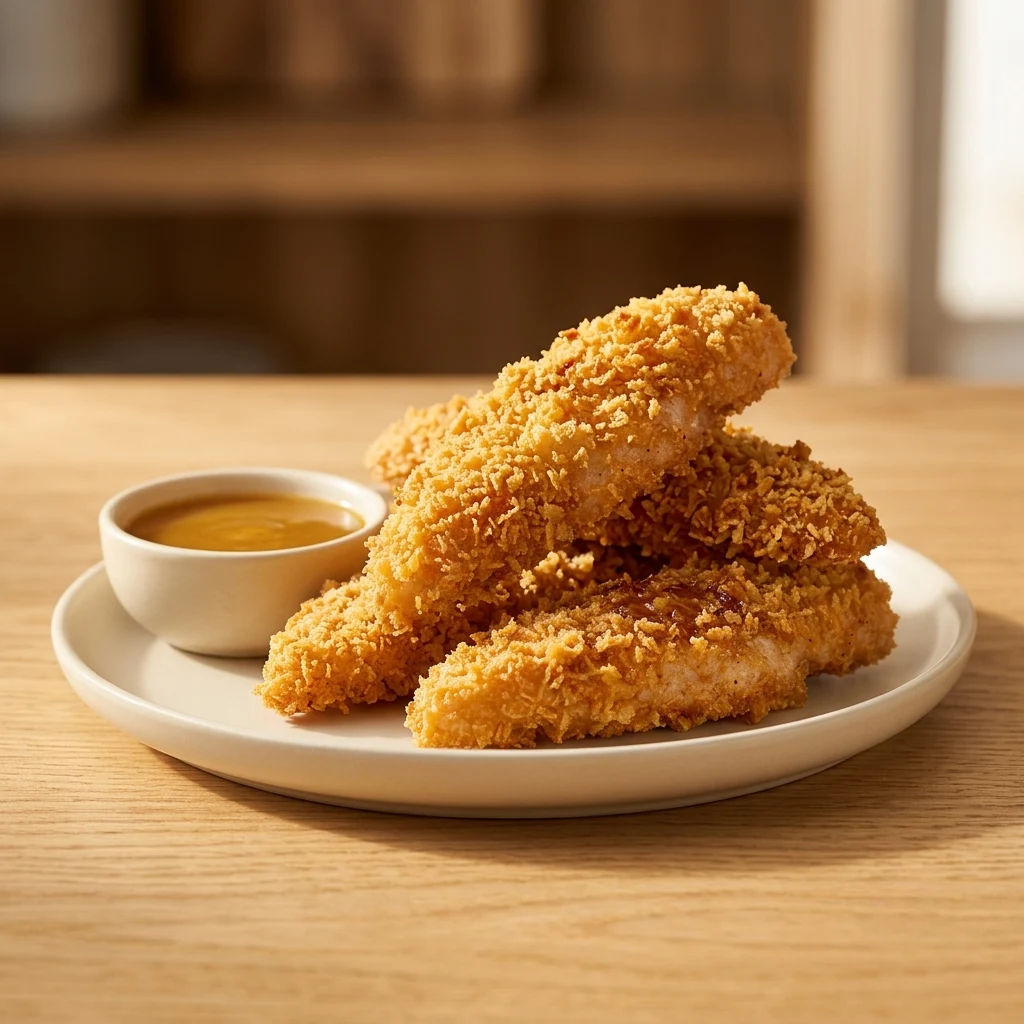
Best Crispy Chicken Tenders Without Deep Frying
The first batch of oven-baked chicken tenders that actually came out crispy happened by accident.
The wire rack was in the pan because there was no room for it anywhere else. The panko was used because the regular breadcrumbs ran out. The double dredge happened because the first coat looked thin. Every one of those “accidents” turned out to be the right call and the chicken tenders that came out were better than anything from a drive-through.
These crispy chicken tenders without deep frying use the same three things that worked that first time: panko breadcrumbs, a wire rack, and a double coating that sticks and stays crunchy all the way through. Here is the full method.
Why Oven-Baked Tenders Can Be Just As Crispy
The deep fryer produces crispiness through full oil submersion the coating fries on all sides simultaneously at consistent temperature. The oven cannot replicate that exactly, but it can get very close with two adjustments.
Wire rack: Lifting the chicken off the pan surface means hot air circulates underneath as well as above. Without a rack, the bottom of the coating sits against a solid surface and steams rather than crisps which is why flat-baked tenders are almost always soft on the bottom.
Panko breadcrumbs: Panko is made from crustless bread processed into larger, flakier crumbs than standard breadcrumbs. The larger surface area means more contact with the hot oven air, more browning per square inch, and a noticeably crunchier texture. Regular breadcrumbs produce a denser, less crispy coating that softens faster.
Those two things wire rack and panko close most of the gap between oven and deep fryer.
About This Recipe
These crispy chicken tenders without deep frying were tested with panko vs regular breadcrumbs, single vs double dredge, wire rack vs flat sheet, oven vs air fryer, and with and without buttermilk soak. The method below produced the crunchiest, most consistent results across every test.
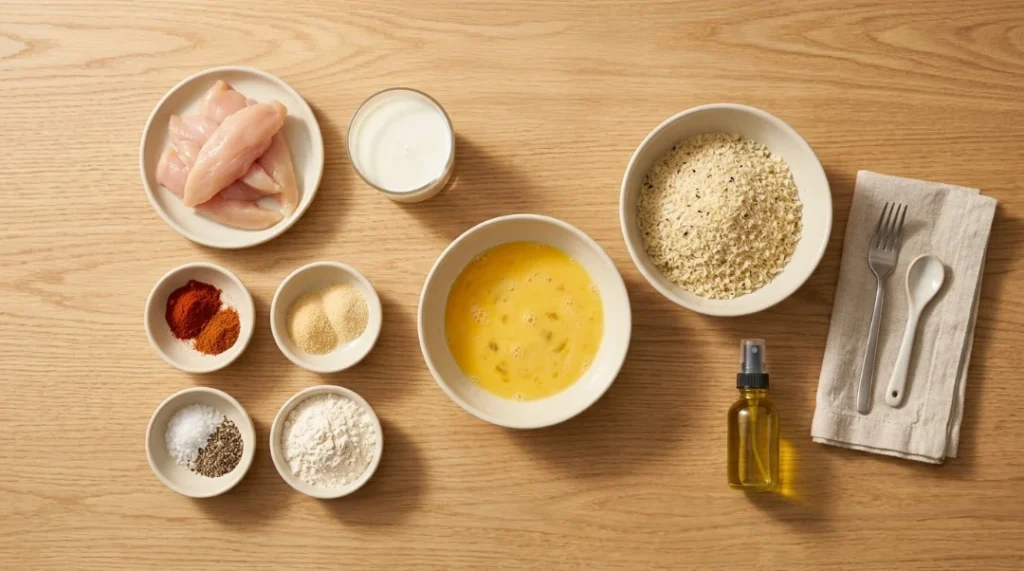
Ingredients
For the Chicken:
- Chicken tenders — 1.5 lbs (about 10 to 12 pieces)
- Buttermilk — ½ cup (the secret to tender meat and coating that sticks substitute below)
For the Coating:
- Panko breadcrumbs — 1.5 cups (not regular panko is non-negotiable for this recipe)
- All-purpose flour — ½ cup (first dredge layer creates the base the egg adheres to)
- Egg — 2 large, beaten
- Smoked paprika — 1 tsp
- Garlic powder — 1 tsp
- Onion powder — ½ tsp
- Salt — 1 tsp
- Black pepper — ½ tsp
- Cayenne — ¼ tsp (optional mild heat that most people do not notice but miss when absent)
- Olive oil spray for coating the breaded tenders
Ingredient Notes and Substitutions
No buttermilk? The genuinely effective substitute is not plain milk. Mix ½ cup regular milk with 1.5 tsp white vinegar or lemon juice. Stir and let sit for 5 minutes it thickens slightly and mimics buttermilk’s acidity and tenderizing effect closely enough that the difference is hard to detect.
Plain yogurt (thinned with 1 tbsp milk) also works well the lactic acid tenderizes similarly to buttermilk.
Gluten-free version: Replace all-purpose flour with rice flour (same amount) and use gluten-free panko. Rice flour produces a surprisingly crispy coating in testing it held up slightly better to reheating than regular flour.
No panko? Regular breadcrumbs produce a denser coating with less crunch. If using regular breadcrumbs, toast them in a dry pan for 3 to 4 minutes first this removes some moisture and significantly improves the final crispiness.
The Coating Falls Off Problem Solved
This is the most common complaint in the comments of every baked chicken tender recipe. The coating slides off, stays in the pan, or turns soggy and detaches from the meat.
Three things cause this:
1. Wet chicken surface. If the chicken is not patted dry before the buttermilk soak, the extra surface moisture prevents the flour from adhering properly. Pat dry first, always.
2. Skipping the flour layer. Flour creates a dry, slightly rough surface that the egg wash adheres to. Egg directly on smooth, moist chicken creates a weak bond. Flour first, then egg, then panko in that order.
3. Single dredge. One pass through the coating produces a thin layer that loosens during baking. The double dredge method flour, egg, panko, then back through egg and panko one more time creates a thicker, more adhesive coating that genuinely stays on.
Step-by-Step Instructions
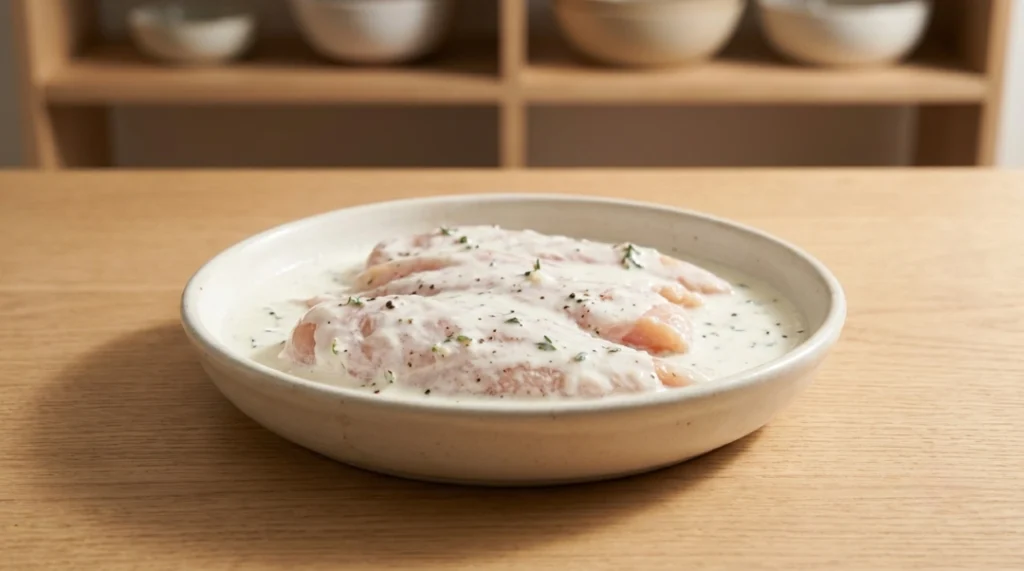
Step 1: Buttermilk Soak (Optional but Recommended)
Place chicken tenders in a shallow dish or zip-lock bag. Pour buttermilk over and turn to coat. Refrigerate for 30 minutes to 2 hours.
The buttermilk soak does two things: the acid gently tenderizes the meat and the dairy proteins help the coating adhere. Skipping it is acceptable for a quick weeknight dinner the texture is slightly less tender but still good. For the best result, 30 minutes is enough.
Step 2: Preheat and Prep the Pan
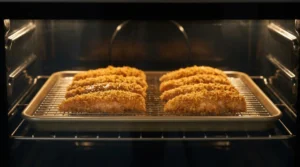
Preheat oven to 425°F (220°C). Place a wire rack on a rimmed baking sheet. Spray the wire rack with olive oil spray.
The rack is non-negotiable. Without it, the bottom coating steams against the pan and stays soft regardless of how well everything else is done.
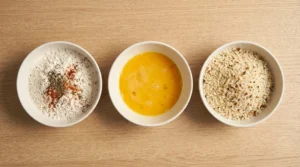
Step 3: Set Up the Dredging Station
Three shallow bowls in order:
- Bowl 1: Flour combined with half the spices (paprika, garlic powder, onion powder, salt, pepper, cayenne)
- Bowl 2: Beaten eggs
- Bowl 3: Panko combined with remaining half of the spices
Seasoning both the flour and the panko means flavor at every layer of the coating not just the surface.
Step 4: The Double Dredge
Remove a tender from buttermilk and let excess drip off. Pat lightly dry.
Round 1:
- Flour (shake off excess)
- Egg (let excess drip)
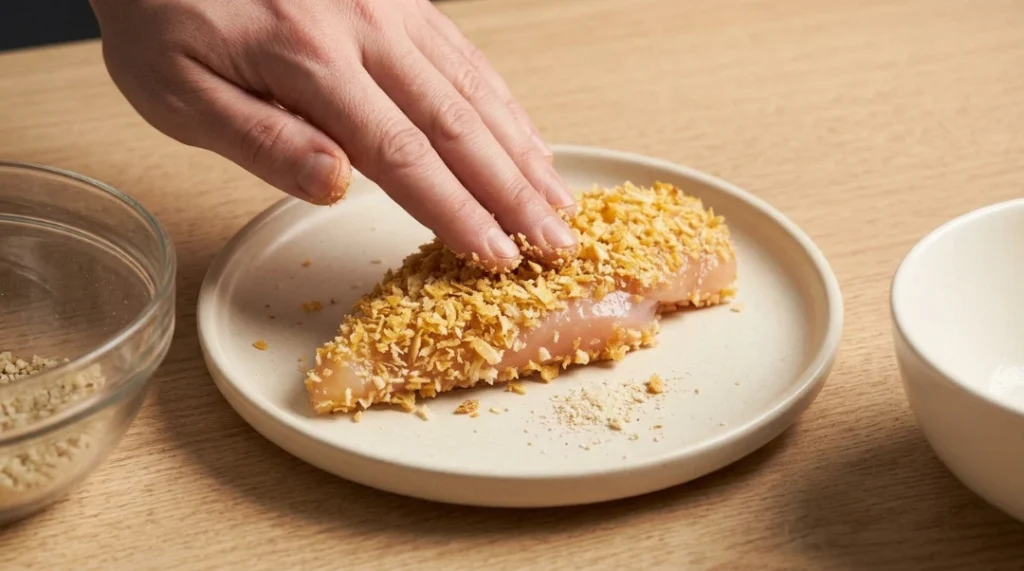
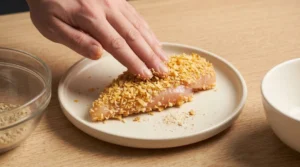
- Panko (press firmly do not just dip, press)
Round 2:
- Back through egg
- Back through panko (press firmly again)
The second pass through adds thickness and fills any gaps in the first coating. The pressing motion is important the panko needs to be physically embedded into the coating, not just sitting on the surface.
Place on the prepared wire rack. Repeat for all tenders.
Step 5: Spray with Olive Oil
Spray the top of all breaded tenders generously with olive oil spray. This step mimics the browning effect of frying the oil on the surface helps the panko toast and develop color in the oven.
Without the spray, panko can bake to pale beige rather than golden. The difference in color is matched by a difference in crunch.
Step 6: Bake
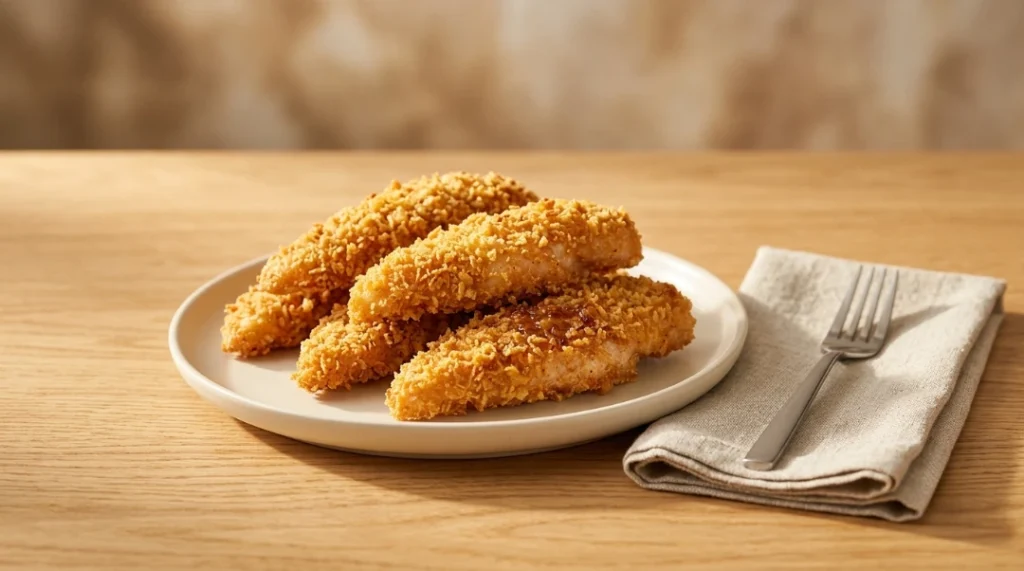
Bake at 425°F for 18 to 22 minutes, flipping halfway through at the 10-minute mark.
Check at 18 minutes smaller tenders finish first. The coating should be deep golden, feel firm when pressed, and the internal temperature should read 165°F at the thickest part per USDA safe minimum cooking temperatures.
Step 7: Rest 3 Minutes Before Serving
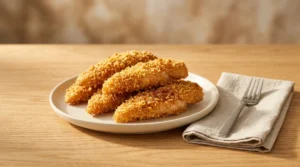
Rest on the wire rack for 3 minutes before serving. The coating sets slightly as it cools and becomes even crunchier. Serving immediately from the oven means the coating is at its softest point.
What Went Wrong in Early Testing
Batch 1: Single dredge, flat baking sheet. The bottom coating was completely soft and the top was pale rather than golden. The coating on two pieces slid partially off during the flip. Double dredge on wire rack on the next batch completely different result.
Batch 2: Regular breadcrumbs instead of panko. The coating was dense and slightly doughy rather than crispy. Toasting the breadcrumbs in a dry pan before using helped significantly, but panko without any modification still outperformed toasted regular breadcrumbs.
Batch 3: Skipped the olive oil spray. The panko baked to a pale, slightly hard rather than golden crispy texture. The flavor was fine but the color and crunch were both noticeably less than the sprayed batches.
Oven vs Air Fryer Honest Comparison
| Factor | Oven (425°F) | Air Fryer (400°F) |
|---|---|---|
| Cook time | 18–22 minutes | 10–12 minutes |
| Crispiness | Excellent | Slightly better |
| Batch size | Large | Smaller batches |
| Cleanup | Easy | Easy |
| Best for | Family serving | Quick weeknight |
Air fryer wins on speed and produces a marginally crispier result the concentrated circulating heat hits the coating from every angle simultaneously. Oven wins on batch size a full rack of tenders at once versus two to three batches in most air fryers.
Air fryer method: Same recipe, same double dredge. Air fry at 400°F for 10 to 12 minutes, flipping at 6 minutes. No preheat needed for most models.
Panko vs Regular Breadcrumbs Side by Side
| Panko | Regular Breadcrumbs | |
|---|---|---|
| Texture | Shatteringly crispy | Dense, slightly doughy |
| Color | Deep golden | Pale golden |
| Sticks well | Yes | Yes |
| Stays crispy | Longer | Softens faster |
| Gluten-free option | Available | Available |
Panko won every comparison in testing. If regular breadcrumbs are the only option, toast them in a dry pan over medium heat for 3 to 4 minutes stirring constantly until golden before using.
Pro Tips
- Double dredge is the game-changer. Single dredge produces thin coating that falls off. Double dredge produces the thick, adhesive layer that stays on and crunches.
- Press the panko in firmly. Pressing rather than just rolling creates physical contact between the coating and the egg layer the coating bonds rather than sits.
- Wire rack is non-negotiable. Bottom coating steams on a flat sheet. A wire rack lets air circulate underneath.
- Olive oil spray produces better color. Without it, panko bakes pale. With it, panko toasts deep golden.
- Rest 3 minutes before serving. The coating firms up as it cools slightly the crunch is noticeably better at 3 minutes than straight from the oven.
Dipping Sauces
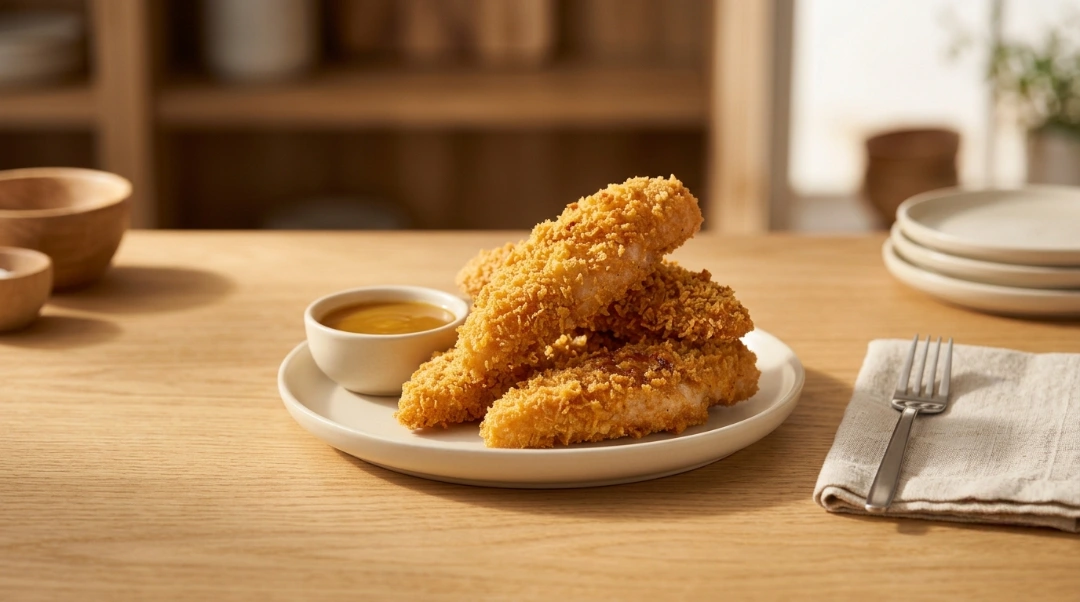
Honey Mustard: 3 tbsp honey + 2 tbsp Dijon mustard + 1 tsp apple cider vinegar. The foolproof classic that works with every variation.
Ranch: Store-bought works. Homemade: ½ cup mayo + 2 tbsp buttermilk + 1 tsp each garlic powder, onion powder, dried dill, salt.
Buffalo: Frank’s RedHot + melted butter (2:1). Toss cooked tenders lightly or serve alongside.
BBQ: Any store-bought BBQ sauce. Warm slightly before serving.
Sriracha Mayo: 3 tbsp mayo + 1 tbsp sriracha + ½ tsp lime juice. Surprisingly good and takes 30 seconds to make.
Variations
Parmesan Crusted: Add ¼ cup finely grated parmesan to the panko mixture. Produces a richer, slightly nuttier crust.
Lemon Herb: Add 1 tsp lemon zest and 1 tsp dried Italian herbs to the panko. Serve with lemon wedges.
Cajun Style: Replace paprika with Cajun seasoning (1.5 tsp). Add ¼ tsp extra cayenne. Bold and slightly spicy.
Gluten Free: Rice flour in place of all-purpose. Gluten-free panko in place of regular. Same method the rice flour coating holds up well and reheats better than the wheat version.
Kid Friendly: Skip cayenne and smoked paprika. Season with garlic powder, salt, and a pinch of onion powder only. Serve with honey mustard universally liked.
What to Serve With
- Crispy Chicken Wings Without Deep Frying — same no-fry philosophy, different cut for party platters
- Best Baked Chicken Breast That Never Dries Out — if you want a full chicken dinner instead of tenders
- Best Air Fryer Chicken Thighs — Perfectly Crispy in 20 Minutes — air fryer version for darker meat fans
- Classic coleslaw the cool crunch is the perfect contrast to hot crispy tenders
- Sweet potato fries bake on the rack below the tenders at the same time
- Simple garden salad makes the tenders feel like a complete meal
Storage and Reheating
Fridge: Up to 3 days in an airtight container. Store on a layer of paper towel to absorb any moisture.
Reheat (oven): 400°F for 8 to 10 minutes on a wire rack, uncovered. The crunch comes back significantly better than expected.
Reheat (air fryer): 375°F for 4 to 5 minutes. The best reheating method for these tenders the coating comes back genuinely crispy, not just warm.
Microwave: Not recommended. The coating turns soft and slightly gummy within 60 seconds. Worth using the oven or air fryer specifically for these.
Freeze: Freeze after baking and cooling completely. Place on a sheet to freeze individually first, then transfer to a bag. Reheat from frozen in oven at 400°F for 12 to 15 minutes or air fryer at 375°F for 8 minutes.
Best Crispy Chicken Tenders Without Deep Frying
Ingredients
Equipment
Method
- Buttermilk Soak (Optional) Place chicken tenders in shallow dish. Cover with buttermilk. Refrigerate 30 minutes to 2 hours. The acid tenderizes and helps coating adhere.
- Preheat and Prep Pan Preheat oven to 425°F. Place wire rack on rimmed baking sheet. Spray rack with olive oil spray.
- Set Up Dredging Station Bowl 1: Flour + half the spices. Bowl 2: Beaten eggs. Bowl 3: Panko + remaining spices.
- Double Dredge Remove tender from buttermilk, let excess drip, pat lightly dry. Round 1: Flour (shake off excess) → Egg (drip off) → Panko (press firmly).Round 2: Back through Egg → Back through Panko (press firmly again).Place on prepared wire rack. Repeat for all tenders.
- Spray and Bake Spray tops of all breaded tenders generously with olive oil spray. Bake at 425°F for 18 to 22 minutes, flipping at 10 minutes, until deep golden and internal temperature reads 165°F per USDA safe minimum cooking temperatures.
- Rest Before Serving Rest on wire rack 3 minutes. Coating firms and crunches more as it cools slightly. Serve with honey mustard, ranch, or buffalo sauce.
Notes
Nutrition Info (per serving, 3 tenders)
| Nutrient | Amount |
|---|---|
| Calories | 312 |
| Protein | 34g |
| Fat | 7g |
| Carbohydrates | 26g |
| Sodium | 520mg |
| Fiber | 1g |
| Sugar | 1g |
Nutrition information is an estimate and may vary depending on the ingredients and brands used. Data sourced from USDA FoodData Central.
FAQs
Q: How do I get crispy chicken tenders without deep frying?
A: Three things make the biggest difference panko breadcrumbs instead of regular, a double dredge coating, and a wire rack so air circulates underneath during baking. Olive oil spray on top before baking produces the golden color and crunch that mimics frying most closely.
Q: Why does the coating fall off my baked chicken tenders?
A: The three most common causes: chicken not patted dry before dredging, skipping the flour layer and going straight to egg, or single dredge producing a coating too thin to adhere. Pat dry, flour first, then egg, then panko pressed firmly then repeat the egg and panko step one more time.
Q: Can I use regular breadcrumbs instead of panko?
A: Regular breadcrumbs work but produce a denser, less crispy result. If using them, toast in a dry pan over medium heat for 3 to 4 minutes before using. The toasting removes moisture and improves the final crunch significantly but panko still outperforms toasted regular breadcrumbs.
Q: How long do crispy chicken tenders take in the oven without frying?
A: 18 to 22 minutes at 425°F on a wire rack, flipping at the 10-minute mark. Smaller tenders finish closer to 18 minutes. Check internal temperature at 18 minutes 165°F is the target per USDA safe minimum cooking temperatures.
Q: Can I make these ahead of time?
A: The breaded tenders can be prepared through the double dredge step and refrigerated on the wire rack for up to 4 hours before baking. Cover loosely with plastic wrap and bake directly from the fridge add 2 to 3 minutes to the bake time. This is a genuinely useful make-ahead option for dinner parties.
Q: Are these good for meal prep?
A: Good for 3 days in the fridge. Reheat in the air fryer at 375°F for 4 to 5 minutes the coating comes back crispy enough to be genuinely good rather than just acceptable. The gluten-free rice flour version actually holds up slightly better through refrigeration and reheating.
About the Author
Written by a home cook and recipe developer who has tested oven and air fryer chicken tender methods across multiple coating types, dredging techniques, and cooking temperatures. Every recommendation in this article reflects real kitchen testing.
Would I Make This Again?
Every Friday night it has become the default when something crowd-pleasing and fast is needed.
The batch that changed the method was the one where everything went right by accident. Since then, the double dredge on a wire rack with panko has been the only version worth making. The oven version handles a big family batch. The air fryer version handles a quick weeknight dinner for two.
Crispy chicken tenders without deep frying that genuinely crunch no oil splatter, no thermometer for frying oil, no cleanup beyond a rack and a sheet pan.
Final Note
Shatteringly crispy chicken tenders from the oven with no deep fryer and no soggy coating the wire rack, the panko, the double dredge, and the olive oil spray are all it takes. None of it is complicated. All of it makes a noticeable difference.
Set up the station, double dredge, spray, bake hot, rest three minutes. That is the whole method.
Made these? Save this recipe for your next Friday night dinner and drop a comment below. Did you go oven or air fryer, and which dipping sauce did you serve with them? Pin this before you forget it.

2 Comments