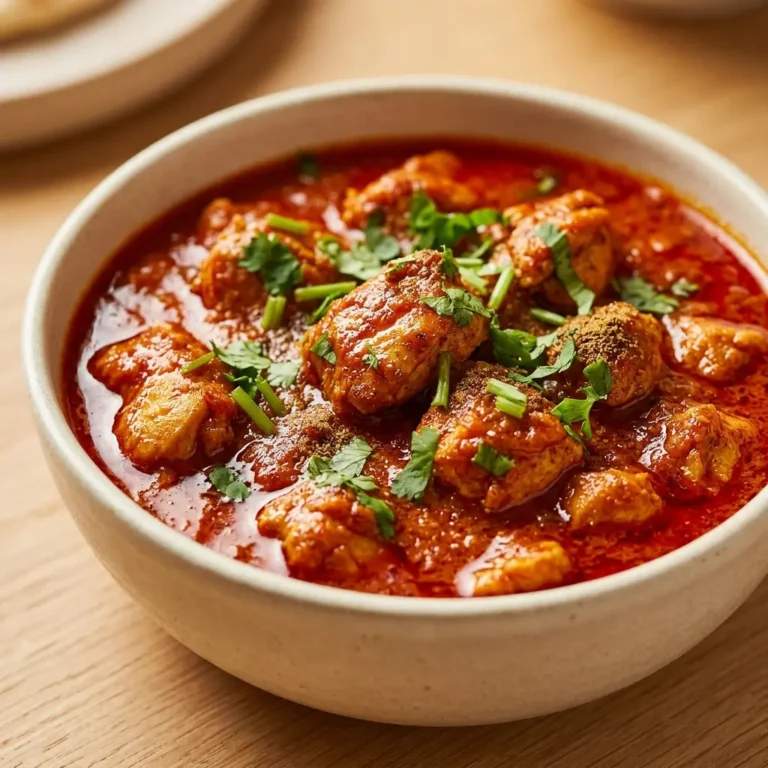

Best Halloween Chicken Mummy Wraps — Kids Love Them
Halloween dinner does not have to be a battle between festive and actually good to eat.
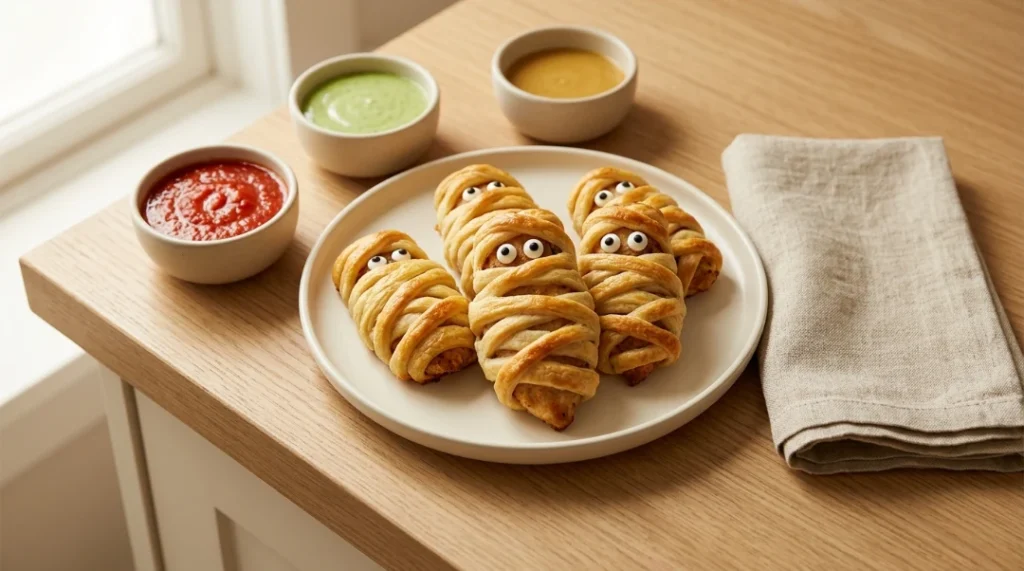
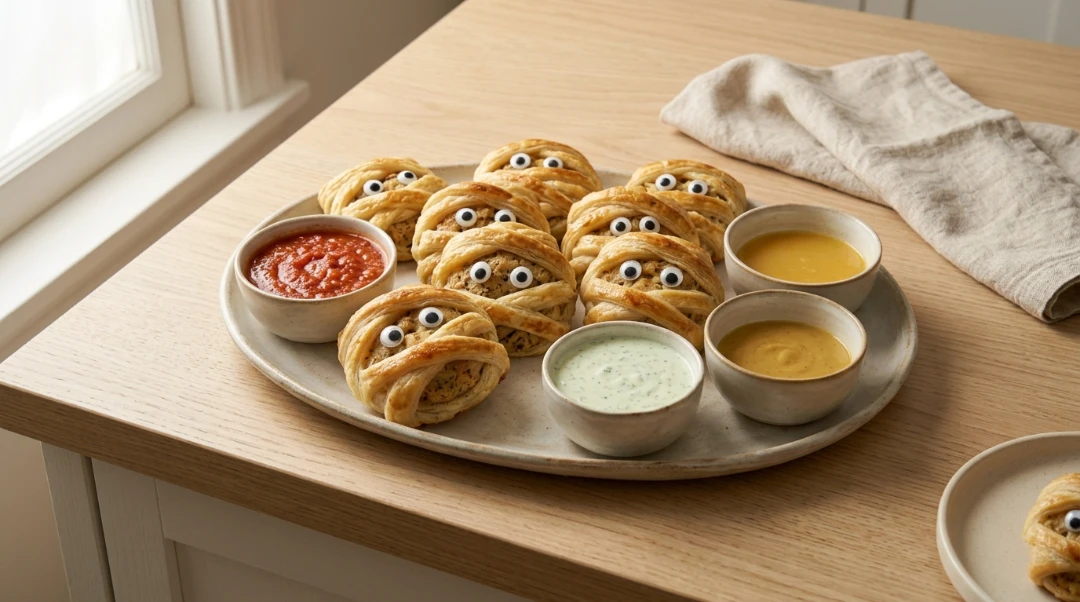
These chicken mummy wraps solve both problems at once. The crescent roll dough wraps into bandages around a cheesy, seasoned chicken filling. The candy eyes go on after baking. The dipping sauces are genuinely part of the fun bloody marinara, green slime ranch, and orange cheddar dip that kids will ask for by name.
These are the perfect mix of spooky and tasty, making them a Halloween party favorite as fun to make as they are to eat.
The difference between these and every other mummy recipe is the chicken filling. Pizza crust bandages that wrap around chicken and cheese create a finger food that will be a Halloween hit. Here is the full method including the technique that keeps the bandages intact and the candy eye timing that nobody warns you about.
Why You’ll Love This Recipe
- Genuinely delicious not just a Halloween novelty, actually great food
- Ready in 25 minutes weeknight Halloween dinner or party appetizer
- Kids make them too wrapping the dough is a fun activity
- Make ahead friendly assemble the night before, bake on Halloween
- Spooky dipping sauces the sauces are half the fun
The Candy Eye Warning Read This First
Avoid baking with the candy eyeballs on they will melt. If storing leftovers with eyes, replace them before serving since they may bleed into the dough.
This is the warning that most Halloween mummy recipes bury in a footnote or skip entirely. Candy eyes the white and black sugar decorations melt completely when baked at 375°F. They turn into a puddle of colored sugar that ruins the mummy face effect.
The rule: Always add candy eyes after baking, not before. Add them while the mummies are still slightly warm they stick to the soft dough surface without any glue or sauce.
If using olive slice eyes instead of candy eyes: make mummy eyes by inserting small pieces of green onions into the depression of a half black olive insert the eyes into one of the openings at the top. Olive eyes can go in before or after baking they do not melt.
About This Recipe
These halloween chicken mummy wraps were tested with homemade chicken filling vs rotisserie chicken, crescent roll dough vs puff pastry vs pizza dough, candy eyes vs olive eyes, oven vs air fryer, and several dipping sauce combinations. The method below produced the most consistently good-looking and genuinely delicious result across every test.
Ingredients
For the Chicken Filling:
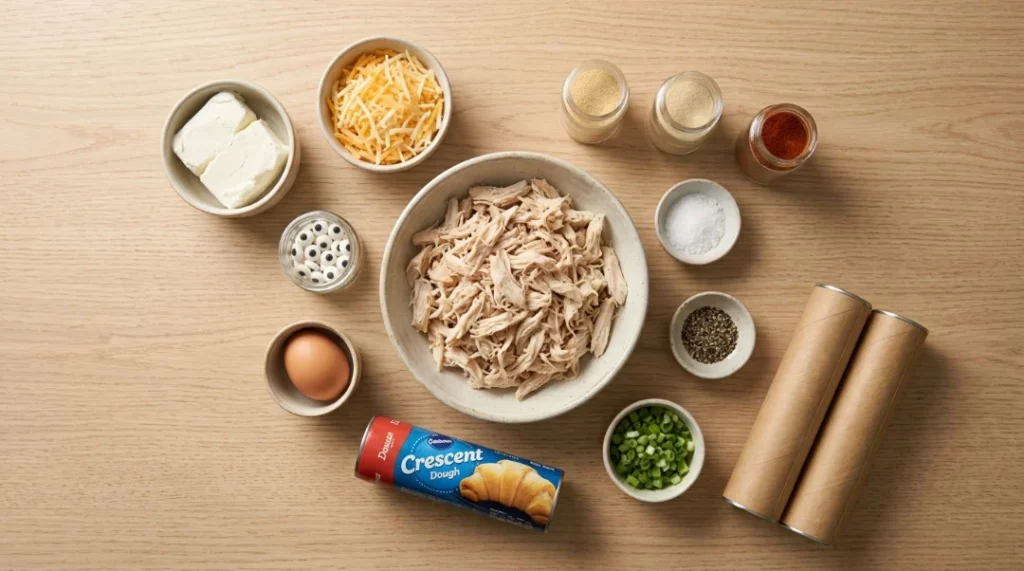
- Rotisserie chicken — 2 cups shredded (the shortcut that adds flavor)
- Cream cheese — 3 oz, softened (binds the filling so it stays inside)
- Shredded cheddar or Monterey Jack — ½ cup
- Garlic powder — ½ tsp
- Onion powder — ¼ tsp
- Smoked paprika — ¼ tsp
- Salt — ¼ tsp
- Black pepper — ¼ tsp
- Green onion — 2 tbsp, finely chopped (optional adds color and freshness)
For the Mummy Wraps:
- Refrigerated crescent roll dough — 2 cans (8 count each) (16 rolls total makes 8 mummies)
- Egg — 1, beaten (egg wash for golden color)
- Candy eyes — 16 (2 per mummy add after baking)
Alternative eye options:
- Black olive slices can bake in oven
- Green onion pieces pressed into olive halves
- Mustard dots applied with a toothpick
Ingredient Notes and Substitutions
Rotisserie chicken: The easiest and most flavorful option. Pre-seasoned rotisserie chicken adds depth to the filling without any extra cooking. Plain poached chicken breast works season it well.
Cream cheese: Essential for binding the filling. Without it, the shredded chicken shifts inside the dough during baking and falls out when bitten. Softened at room temperature mixes smoothly cold cream cheese leaves lumps. USDA safe minimum cooking temperatures for chicken
Crescent roll dough: Crescent rolls are very similar to biscuits, only a little thinner and lighter in consistency if unavailable, flatten biscuit dough a bit more when putting the chicken filling in. Puff pastry works as a substitute and produces a flakier, more buttery result reduce bake time to 18 to 20 minutes.
Cheese options: Cheddar produces the sharpest flavor. Monterey Jack melts more smoothly. A mix of both works excellently. Pepper Jack adds a mild heat that adults appreciate use for an adult-friendly version.
How to Cut Dough Strips Without Tearing
This is the step where most people struggle. Crescent roll dough tears easily when pulled especially at the perforations between triangles.
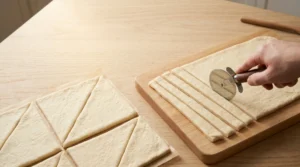
The technique: Unroll the crescent roll dough and separate it into rectangles, pressing the edges of two triangles together to seal the perforations.This creates solid rectangles without weak points.
Pop open the can of crescent rolls and spread into a sheet. Slice the sheet into small strips these will be the mummy wraps.
Using a sharp knife or pizza cutter not tearing by hand produces clean strips that stretch without breaking. Cut strips approximately ¼ inch wide. Slightly wider strips produce a more dramatic bandage effect. Thinner strips look more realistic but tear more easily.
Do not overwork the dough. Warm hands make crescent roll dough sticky and difficult to work with. If the dough becomes too soft, refrigerate it for 5 minutes before continuing.
Step-by-Step Instructions
Step 1: Make the Chicken Filling
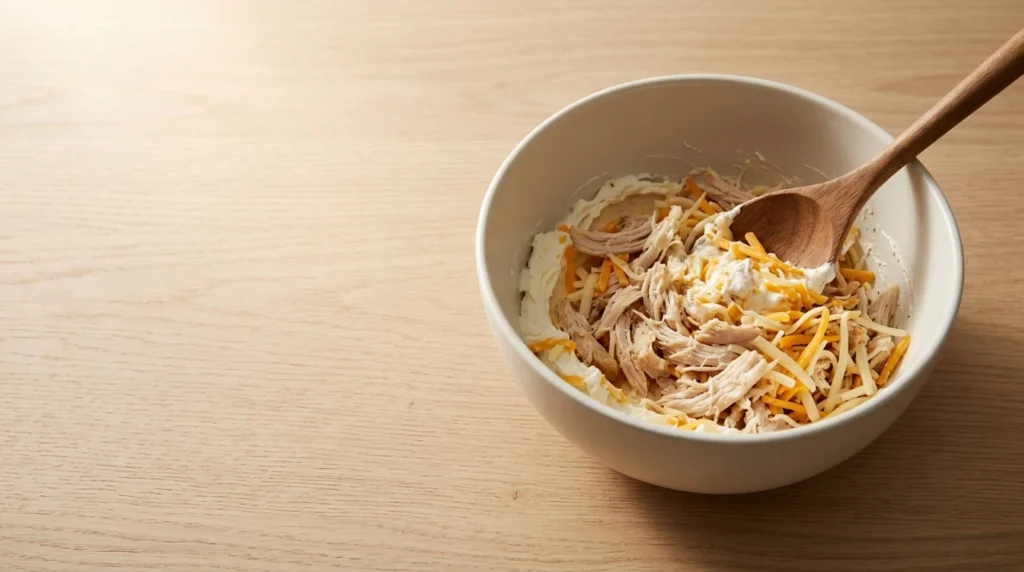
Combine softened cream cheese, shredded rotisserie chicken, shredded cheese, garlic powder, onion powder, smoked paprika, salt, pepper, and green onion in a bowl. Mix until evenly combined the cream cheese should coat every piece of chicken.
Taste before filling. The mixture should be well-seasoned it is inside the dough and needs to carry enough flavor through the crescent roll exterior.
Refrigerate for 10 minutes if the mixture seems too soft to work with. A slightly firmer filling is easier to place inside the dough without it running.
Step 2: Preheat and Prep
Preheat oven to 375°F (190°C). Line a baking sheet with parchment paper.
375°F is slightly lower than the standard crescent roll baking temperature the lower temperature gives the dough time to fully cook around the chicken filling without the exterior browning too fast before the inside heats through.
Step 3: Prepare the Dough
Open one can of crescent rolls. Press two triangles together along the perforated seam to form a rectangle. Set the completed rectangle aside.
From the second can, cut dough sheets into strips approximately ¼ inch wide using a sharp knife or pizza cutter on a lightly floured surface.
Step 4: Fill the Mummies
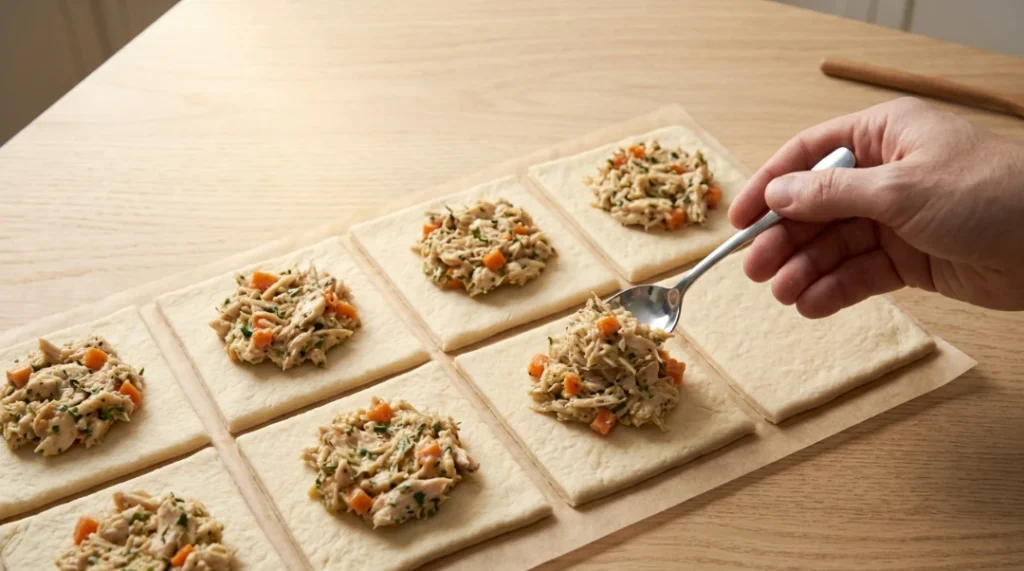
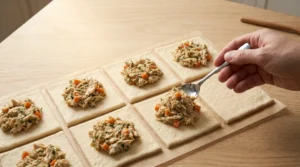
Place 2 to 3 tablespoons of chicken filling in the center of each rectangle, leaving a ½ inch border on all sides. Do not overfill the dough needs room to seal and the filling expands slightly during baking.
Fold the short ends of the rectangle over the filling to enclose it. Press firmly to seal.
Step 5: Wrap the Bandages
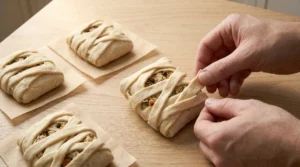
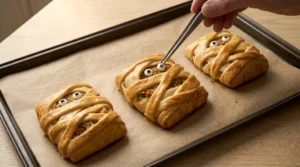
Wrap dough strips around each filled piece to look like mummy bandages stretching dough strips slightly to cover. Leave an opening about a half inch from one end for the eyes.
Crossing the strips at irregular angles looks more authentically mummy-like than straight parallel wrapping. Imperfection is part of the effect.
If the dough tears a bit, just patch it up imperfection is part of the charm. Mummy wrappings should look a little haphazard anyway.
The tuck method: Make sure to tuck the ends of each dough strip underneath the mummy. This helps keep the filling sealed and prevents the strips from opening while baking. Tucking the strip ends underneath is what keeps the mummy shape intact during baking untucked ends lift and curl in the oven.
Step 6: Egg Wash and Bake
Place wrapped mummies on parchment-lined baking sheet with space between each they expand during baking.
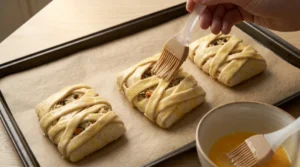
Brush the dough surface lightly with beaten egg. The egg wash produces the golden color that makes the mummies look properly baked rather than pale.
Bake at 375°F for 12 to 15 minutes until dough is deep golden brown and the filling is heated through.
Do not add candy eyes before baking. They melt. See the candy eye warning above.
Step 7: Add the Eyes
Remove from oven. Let cool for 3 to 4 minutes the dough should still be warm and slightly soft.
Press candy eyes gently into the dough in the opening left for the face. They stick without any adhesive when the dough is still warm. Once the dough cools completely, the eyes sit less securely.
If using olive eyes: press them in at any point before or after baking.
Step 8: Serve with Dipping Sauces
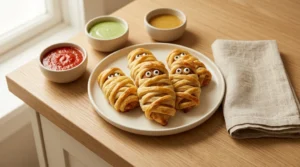
Serve immediately with spooky dipping sauces on the side.
What Went Wrong in Early Testing
Batch 1: Added candy eyes before baking. The eyes melted into orange and white puddles across the mummy faces within the first 5 minutes in the oven. The mummies tasted fine but looked nothing like mummies. Eyes added after baking in every subsequent batch.
Batch 2: Strips cut by hand tearing along perforations. The strips were uneven and tore at the perforated seams. Several mummies came out of the oven with large gaps where the dough had split. Pressing two triangles together before cutting eliminated the weak perforations completely.
Batch 3: Overfilled with chicken mixture. The dough could not seal properly around the excess filling. Two mummies burst during baking the filling spilled out and the dough balloon around air rather than filling. 2 to 3 tablespoons maximum, firmly sealed, solved the problem.
Spooky Dipping Sauce Guide
This is what turns a good dinner into a genuinely memorable Halloween experience.
Bloody Marinara: Warm marinara sauce in a small bowl. Add 2 drops red food coloring for deeper color. Serve in a small black or orange bowl. Label with a small card: “Mummy’s Blood.”
Green Slime Ranch: Mix store-bought ranch dressing with 4 drops green food coloring. Stir until evenly colored. The slime-green color produces a strong reaction from kids. Label: “Monster Slime.”
Orange Cheddar Dip: Melt ¼ cup shredded cheddar with 2 tbsp cream cheese and 1 tbsp milk in a microwave in 30-second intervals until smooth. Color naturally orange from the cheese. Label: “Pumpkin Dip.”
Honey Mustard Mummy Dip: Mix 2 tbsp honey + 1 tbsp Dijon mustard + 1 tbsp mayonnaise. Classic combination that works for every age group.
Creative dipping sauces the family will love: spicy mustard dip mixed with honey for sweet and tangy flavor, and garlic aioli perfect for those who love garlic.
Make Ahead Guide Halloween Party Planning
The night before: Make the chicken filling and refrigerate. Prepare dough strips. Assemble mummies through Step 5. Place on parchment-lined baking sheet, cover tightly with plastic wrap, and refrigerate overnight.
Day of party: Remove from fridge 15 minutes before baking. Brush with egg wash. Bake at 375°F for 14 to 16 minutes (add 1 to 2 minutes for cold filling). Add eyes after baking. USDA food safety refrigeration guidelines
To make ahead assemble the mummies and place them on a baking tray. Cover with plastic wrap and store in the fridge for up to 24 hours before baking.
Already baked reheating: 375°F for 5 to 6 minutes. Eyes should be added fresh after reheating since candy eyes may shift or melt during storage.
Air Fryer vs Oven Comparison
| Oven (375°F) | Air Fryer (350°F) | |
|---|---|---|
| Cook time | 12–15 min | 8–10 min |
| Color | Deep golden | Very golden, slightly more even |
| Batch size | All at once | 3 to 4 mummies at a time |
| Best for | Party quantities | Quick weeknight dinner |
| Shape retention | Excellent | Excellent |
Preheat the air fryer to 350°F for about 5 minutes before adding mummies.
Air fryer works well for smaller batches the circulating heat produces an evenly golden exterior in less time. For a Halloween party where 8 or more mummies are needed, the oven is more practical.
Adult Version Upgraded Filling
Same mummy shape more sophisticated filling for adult guests:
Spicy Chipotle Chicken: Add ½ tsp chipotle powder and 1 tbsp adobo sauce to the cream cheese mixture. Top with pepper Jack instead of cheddar. Serve with smoky chipotle mayo dip.
Buffalo Chicken Mummies: Toss shredded chicken with 2 tbsp buffalo sauce before mixing with cream cheese. Top with blue cheese crumbles instead of cheddar. Serve with ranch dip.
Garlic Herb Chicken: Add 1 tsp Italian seasoning, 1 tsp garlic powder (double the base), and ¼ cup sun-dried tomatoes to the filling. Top with mozzarella. Serve with marinara.
What to Serve With
- Best Halloween Bat Wings — Spooky Balsamic Glazed — complete the Halloween chicken spread
- Best Crispy Chicken Tenders Without Deep Frying — the year-round version of this kid-friendly chicken
- Best Easy Homemade Chicken Pot Pie — for a more substantial Halloween dinner
- Simple side salad something fresh balances the rich filling
- Sweet potato wedges naturally orange for Halloween theme
- Apple slices with caramel dip easy Halloween dessert alongside
Storage and Reheating
Fridge: Up to 3 days in an airtight container. Remove candy eyes before storing they soften in the fridge and may bleed color into the dough.
Reheat (oven): 375°F for 5 to 6 minutes. Add fresh candy eyes after reheating.
Reheat (air fryer): 350°F for 3 to 4 minutes. Quickest method dough crisps back up nicely.
Reheat (microwave): 30 seconds at medium power. Dough softens but acceptable for a quick lunch.
Freeze: Freeze before baking for best results assemble through Step 5, freeze on parchment, then transfer to freezer bags. Bake from frozen at 375°F for 18 to 20 minutes. Do not freeze baked mummies the dough becomes soggy when thawed.
Best Halloween Chicken Mummy Wraps
Ingredients
Equipment
Method
- Make Chicken Filling Combine softened cream cheese, shredded rotisserie chicken, shredded cheese, and all seasonings in a bowl. Mix until evenly combined. Refrigerate 10 minutes if mixture seems too soft. Taste and adjust seasoning filling should be well-seasoned enough to taste through the dough.
- Preheat Preheat oven to 375°F. Line baking sheet with parchment.
- Prepare Dough Open one can. Press two triangles together along perforated seams to form solid rectangles no weak points. From second can, cut dough into ¼-inch strips using sharp knife or pizza cutter. Pressing triangles together before cutting prevents tearing.
- Fill Place 2 to 3 tbsp chicken filling in center of each rectangle ½ inch border all around. Do not overfill. Fold short ends over filling and press firmly to seal.
- Wrap Bandages Wrap dough strips around each filled piece at irregular angles leave ½ inch opening for eyes. Tuck strip ends underneath each mummy this keeps the shape intact during baking. Imperfect wrapping looks more authentically mummy-like.
- Egg Wash and Bake Place mummies on prepared baking sheet with space between each. Brush dough with beaten egg. Bake at 375°F for 12 to 15 minutes until deep golden. Internal chicken filling should reach 165°F per USDA safe minimum cooking temperatures.
- Add Eyes After Baking Cool 3 to 4 minutes dough still warm. Press 2 candy eyes into the face opening of each mummy. They stick to warm dough without any adhesive. Never add candy eyes before baking they melt completely.
- Serve with Dipping Sauces Serve immediately with bloody marinara, green slime ranch, and honey mustard dipping sauces.
Notes
Nutrition Info (per serving, 2 mummies)
| Nutrient | Amount |
|---|---|
| Calories | 412 |
| Protein | 24g |
| Fat | 22g |
| Carbohydrates | 32g |
| Sodium | 680mg |
| Fiber | 1g |
| Sugar | 6g |
Nutrition information is an estimate and may vary depending on the ingredients and brands used. Data sourced from USDA FoodData Central.
FAQs
Q: When do I add the candy eyes to Halloween chicken mummy wraps?
A: After baking never before. Candy eyes melt completely at baking temperatures and turn into colored puddles. Add them while the mummies are still warm from the oven (about 3 to 4 minutes of cooling) so they stick to the soft dough surface. Olive slice eyes can be added before or after baking they do not melt.
Q: How do I keep the crescent roll strips from tearing?
A: Press two dough triangles together along the perforated seam to form a solid rectangle before cutting strips. Cut with a sharp knife or pizza cutter not by hand. Slightly chilled dough tears less easily than warm dough. If strips tear during wrapping, patch them imperfect bandages look more authentically mummy-like.
Q: Can I make Halloween chicken mummy wraps ahead of time?
A: Yes assemble through the wrapping step, cover tightly with plastic wrap, and refrigerate for up to 24 hours before baking. Add egg wash right before baking. Add 1 to 2 minutes to bake time to account for the cold filling.
Q: What is the best dipping sauce for chicken mummy wraps?
A: Bloody marinara (marinara with a few drops red food coloring) is the Halloween crowd favorite. Green slime ranch (ranch with green food coloring) gets the strongest reaction from kids. Honey mustard is the most universally liked by adults and children. Serve all three for a complete Halloween dipping experience.
Q: Can I use puff pastry instead of crescent roll dough?
A: Yes puff pastry produces a flakier, more buttery exterior. Cut into strips and wrap the same way. Reduce bake time to 18 to 20 minutes and watch closely puff pastry browns faster than crescent dough. The result looks slightly more refined and less “cartoon mummy” which some people prefer for adult parties.
Q: How many mummies does one batch make?
A: Two cans of crescent rolls (16 rolls total) and the chicken filling as written produces 8 mummies enough for 4 to 6 people as a dinner or 8 to 10 as a party appetizer. Double everything for a larger Halloween party.
About the Author
Written by a home cook who has made Halloween chicken mummy wraps for several Octobers testing dough types, filling combinations, eye placement timing, and make-ahead methods until landing on the method below that consistently produces genuinely good food that also looks properly spooky.
Would I Make This Again?
Every October specifically requested by name from the kids at this point.
The candy eye discovery happened after the first batch the melted puddles of colored sugar were genuinely alarming. Eyes after baking from that point on. The tuck method for the strip ends came from a batch where half the mummies unwrapped in the oven and came out looking like flat pastries with chicken on top. Both discoveries happened in the same batch, which made for a memorable Halloween cooking session.
Halloween dinner that kids eat enthusiastically, adults eat willingly, and everyone remembers. That is the right combination for October cooking.
Final Note
Cheesy chicken filling wrapped in crescent roll bandages with spooky eyes and dipping sauces the candy eye timing, the tuck method, and the make-ahead option are what make this recipe genuinely party-ready.
Fill, wrap with tucked ends, egg wash, bake at 375°F, add eyes after. That is the whole method.
Made these? Save this recipe before Halloween and drop a comment below. Which dipping sauce got the biggest reaction, and did you try the buffalo chicken filling? Pin this for your Halloween party menu.