

Best Stuffed Chicken Breast — Easy Weeknight Winner
The first time stuffed chicken breast appeared at a dinner table in this kitchen, three people asked if it came from a restaurant.
It did not. It took 30 minutes, one pan, and a filling made from five ingredients that cost less than the delivery fee would have.
That is the thing about stuffed chicken breast it looks and tastes like an occasion meal but works on a Tuesday. The spinach and cream cheese filling stays soft and creamy inside while the chicken develops a golden sear on the outside. The filling keeps the chicken breast moist from the inside out, which solves the dry chicken problem that makes so many baked breast recipes disappointing.
Here is the full method including the pocket technique, the filling that does not fall out, and the cheese that actually stays inside.
Why You’ll Love This Recipe
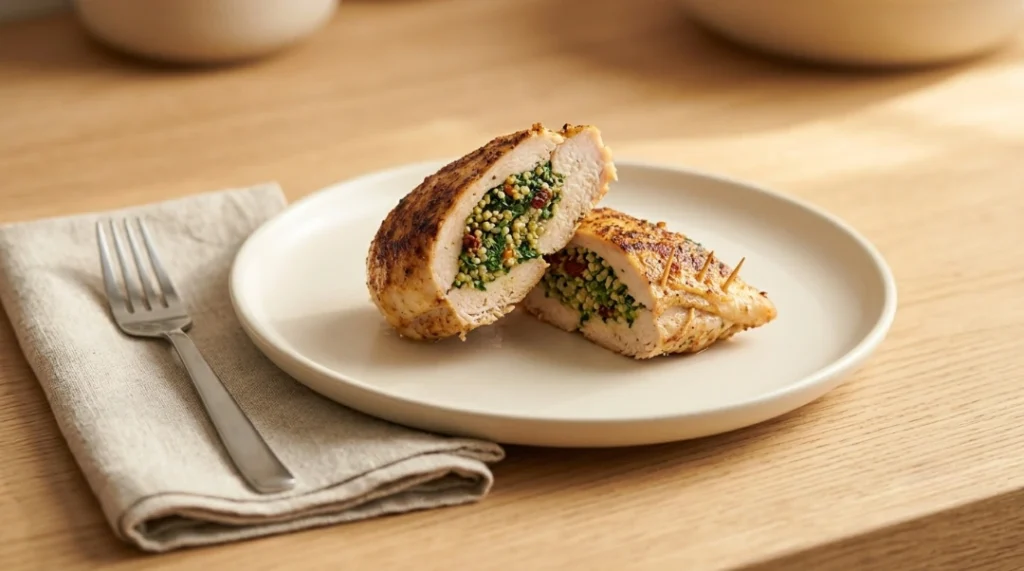
- Looks restaurant-quality: sliced cross-section of creamy filling impresses every time
- Ready in 30 minutes: faster than most weeknight pasta dishes
- Filling stays inside: cream cheese base solves the leaking problem permanently
- Keeps chicken juicy: the filling moisturizes from the inside out
- Endlessly customizable: five filling variations, all using the same method
Why Cream Cheese Works Better Than Mozzarella Here
Most stuffed chicken breast recipes use shredded mozzarella. Mozzarella has excellent meltability but it also releases significant moisture as it melts, which can pool inside the pocket and eventually leak out through any gaps in the chicken.
Cream cheese behaves differently. It softens and becomes creamy under heat but does not release liquid the same way. It acts as a binder for the other filling ingredients the spinach, garlic, and herbs stay suspended in it rather than shifting around inside the pocket. cream cheese nutritional properties via USDA
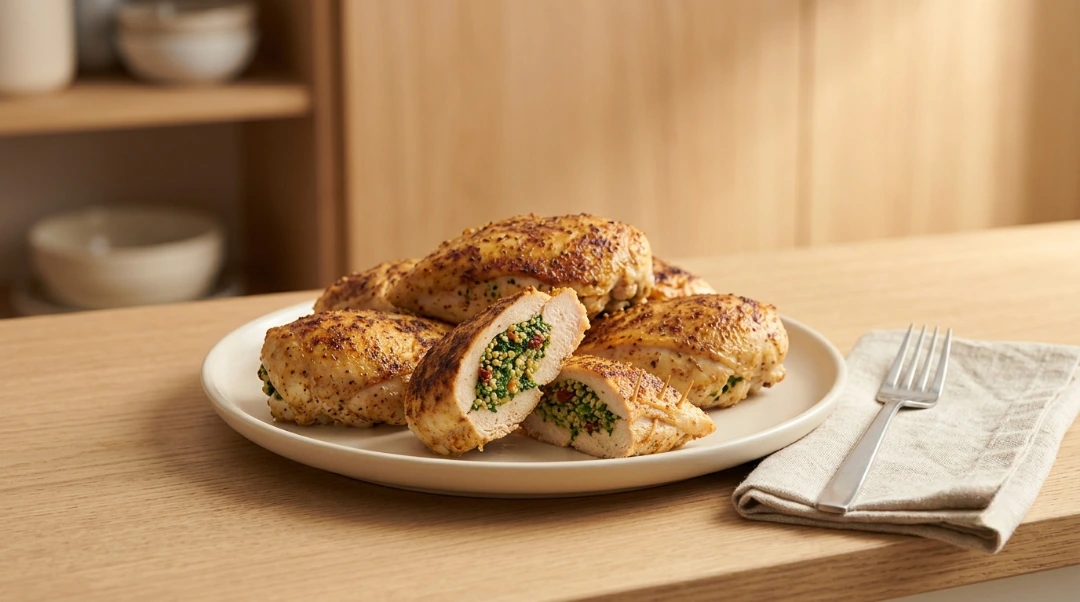
In testing, cream cheese filling stayed inside the chicken across every batch. Shredded mozzarella filling leaked partially out in three out of four batches. The cream cheese version also produced a noticeably more cohesive, restaurant-quality cross-section when sliced.
Mozzarella works excellently as a thin layer on top of the cream cheese base adding stretch and browning without the leaking problem of using it as the primary filling.
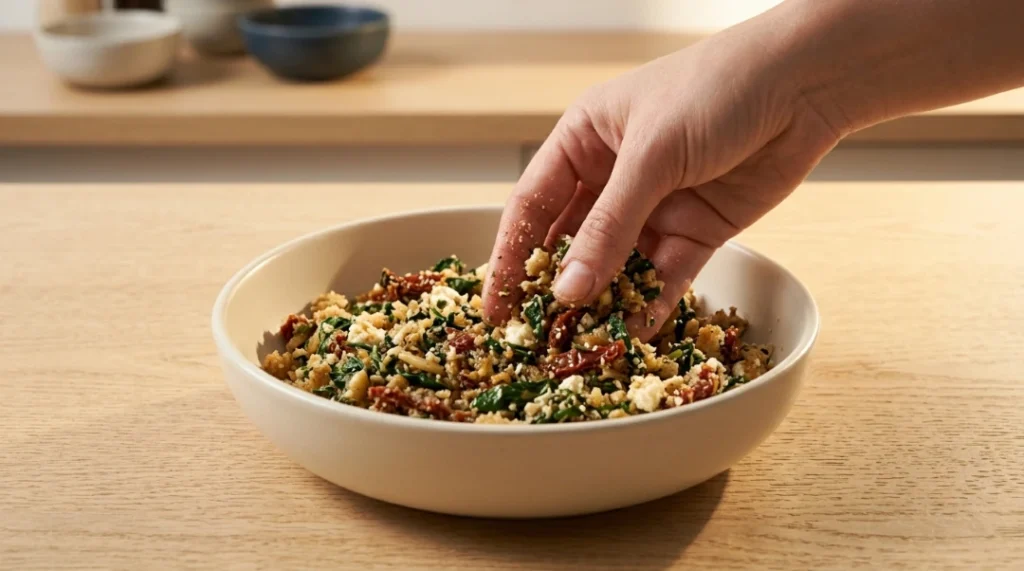
About This Recipe
This stuffed chicken breast easy recipe was tested with four different filling combinations, two cooking methods (sear-then-bake vs bake only), toothpicks vs twine vs neither, and different pocket depths. The method below produced the most consistent filling retention, juiciest meat, and best presentation across every test.
Ingredients
For the Chicken:
- Boneless skinless chicken breasts — 4 large (7 to 8 oz each)
- Olive oil — 1 tbsp
- Salt — ½ tsp (for exterior seasoning)
- Black pepper — ½ tsp
- Smoked paprika — ½ tsp (adds color to the exterior sear)
- Garlic powder — ½ tsp
For the Spinach Cream Cheese Filling:
- Cream cheese — 4 oz, softened (full fat reduced fat does not bind as well)
- Fresh spinach — 1 cup, roughly chopped (or ½ cup frozen spinach, thawed and squeezed very dry)
- Garlic — 2 cloves, minced
- Parmesan cheese — 2 tbsp, finely grated
- Mozzarella — ¼ cup shredded (mixed into filling for stretch, not as primary filling)
- Salt — ¼ tsp
- Black pepper — ¼ tsp
- Red pepper flakes — ¼ tsp (optional adds subtle warmth)
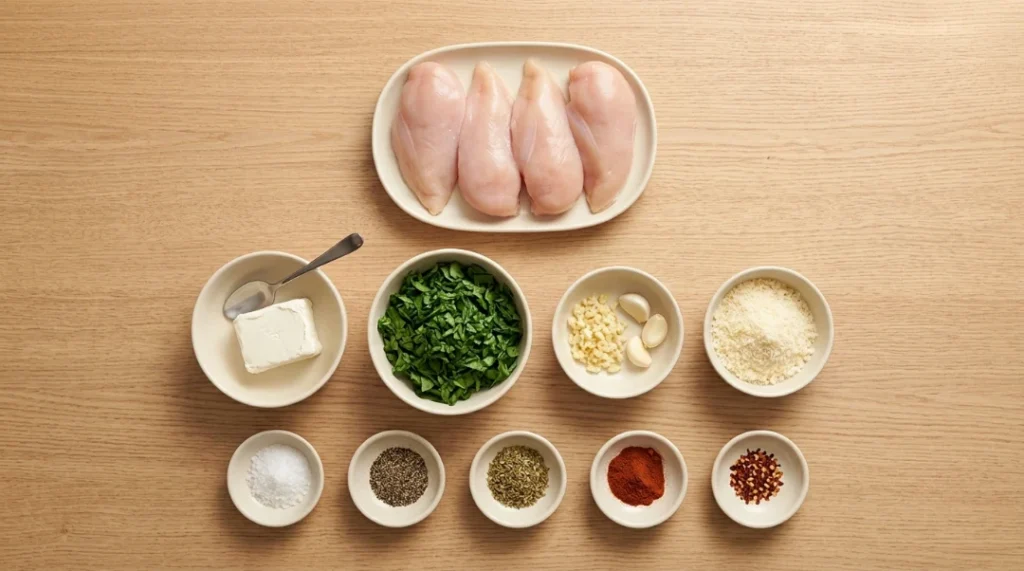
Ingredient Notes and Substitutions
Cream cheese: Full-fat produces a creamier, more stable filling. Reduced-fat cream cheese has a higher water content and produces a slightly thinner filling that is more likely to leak. Goat cheese works as a substitute and produces a tangier, slightly richer result.
Spinach: Fresh spinach wilts down significantly during cooking. If using frozen, thaw completely and squeeze out every drop of moisture in a kitchen towel before using wet frozen spinach makes the filling watery and increases leaking risk.
Mozzarella: Part-skim mozzarella melts more smoothly than full-fat for this application and produces less oil separation inside the filling.
Variations on the filling: Sun-dried tomatoes (2 tbsp, chopped) add sweetness and color. Roasted red peppers (2 tbsp, drained and chopped) add depth. Fresh basil (1 tbsp) brightens the filling considerably. Any of these can be added or substituted without changing the method.
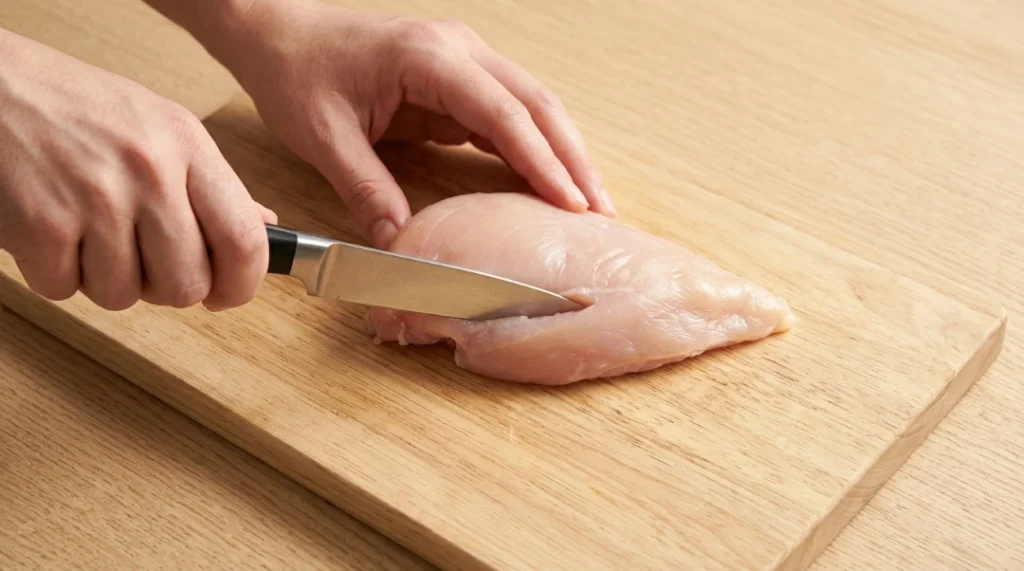
How to Cut the Pocket The Technique Most Sites Skip
This is the step where most stuffed chicken breast recipes fail in the kitchen the instructions assume the technique is obvious. It is not.
The correct method:
Place the chicken breast flat on a cutting board, smooth side up. Identify the thickest point usually roughly in the center of the breast.
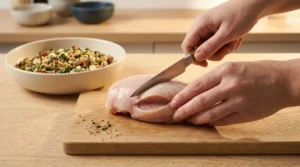
Insert a sharp paring knife or thin boning knife horizontally into the thickest point, parallel to the cutting board. Push the knife three-quarters of the way through the breast stopping about ½ inch from the other side, the top, and the bottom. Do not cut all the way through.
Gently move the knife up and down to widen the pocket without creating an opening at the top, bottom, or back. The pocket should be accessible only from one side the original entry point.
What not to do:
- Do not butterfly the breast open like a book this creates too large an opening and the filling falls out during cooking.
- Do not cut all the way through to the other side this splits the breast into two pieces.
- Do not make the pocket too shallow filling needs 2 to 3 tbsp. of space to sit in without pressure.
Use a finger to gently widen the pocket from the inside after the initial knife cut this helps create even space without risking cutting through the sides.
How Much Filling The Overstuffed Problem
Every stuffed chicken breast recipe says “stuff the chicken” without specifying how much. Both too much and too little cause problems.
Understuffed: The filling spreads into a thin layer, loses its distinct creamy texture when cooked, and the breast looks flat when sliced.
Overstuffed: The pressure from excess filling forces the pocket opening wider during baking. The filling leaks out, pools on the pan, and the breast often loses its shape.
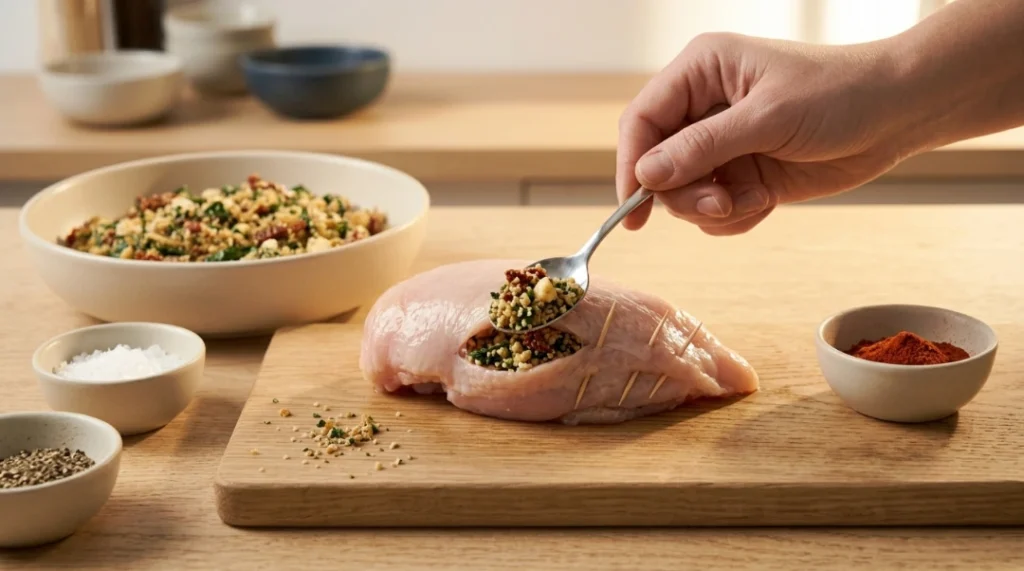
The right amount: 2 to 3 tablespoons of filling per breast, pressed gently into the pocket without packing it tightly. The pocket should close naturally with gentle pressure if it needs significant force to close, there is too much filling inside.
Prep Tips Before You Start
Count toothpicks before stuffing you need to recover all of them before serving
Bring chicken to room temperature 15 minutes before cooking cold chicken sears unevenly
Pat chicken completely dry before cutting the pocket moisture prevents proper searing
Soften cream cheese at room temperature for 20 minutes cold cream cheese does not mix smoothly
Have an instant-read thermometer ready the only reliable way to check doneness
Step-by-Step Instructions
Step 1: Make the Filling
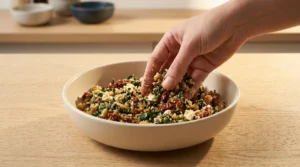
Combine softened cream cheese, chopped spinach, minced garlic, parmesan, shredded mozzarella, salt, pepper, and red pepper flakes in a bowl. Mix until evenly combined. The filling should hold together in a spoon not be runny or liquid.
If using frozen spinach: squeeze until completely dry before adding. Even small amounts of residual moisture make the filling loose and increase leaking.
Taste the filling before stuffing it should be well-seasoned on its own. The chicken exterior gets separate seasoning.
Step 2: Cut the Pockets
Follow the pocket-cutting technique above. After cutting, use a finger to gently widen the internal space. The opening should be just wide enough to fit a spoon not a gaping slit across the entire side of the breast.
Step 3: Fill and Secure
Spoon 2 to 3 tablespoons of filling into each pocket. Use a small spoon or butter knife to press the filling evenly toward the back of the pocket.
Securing the pocket: Close the opening by pressing the edges together firmly. Insert 2 to 3 toothpicks across the opening at 1-inch intervals to hold it closed during cooking. Toothpicks outperformed kitchen twine in testing twine loosened as the chicken expanded during cooking, while toothpicks held the opening closed more reliably.
Reminder: Count the toothpicks as you insert them. Count them again before serving.
Step 4: Season the Exterior
Pat the outside of each stuffed breast dry with a paper towel. Brush with olive oil. Season all surfaces with salt, pepper, smoked paprika, and garlic powder.
Drying the exterior before seasoning ensures the seasoning adheres and the sear develops properly wet chicken surface produces steam rather than browning.
Step 5: Sear First Why It Matters
Heat an oven-safe skillet over medium-high heat. Add a thin film of oil.
Place stuffed breasts smooth side down. Sear for 3 to 4 minutes without moving until deep golden. Flip carefully and sear the second side for 2 minutes.
Testing sear-first vs bake-only: the seared version developed a noticeably richer exterior color and flavor. The bake-only version was pale and slightly flat in appearance. The sear adds 6 minutes of total time and makes a visible and testable difference worth it every time.
Step 6: Bake to Finish
Transfer the oven-safe skillet directly to a preheated 400°F (200°C) oven. Bake for 18 to 22 minutes until internal temperature reads 165°F at the thickest part of the chicken away from the filling pocket.
Check temperature at 18 minutes. Larger breasts may need the full 22 minutes. Insert the thermometer into the meat itself, not into the filling the filling temperature is not a reliable indicator of chicken doneness.
Step 7: Rest and Remove Toothpicks
Remove from oven. Rest in the skillet for 5 minutes. Remove all toothpicks before serving check that the count matches what went in.
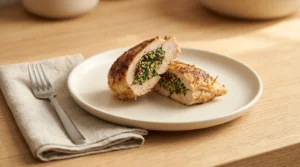
Slice each breast diagonally to reveal the filling. The cream cheese filling should be hot, creamy, and visible in a clean cross-section.
What Went Wrong in Early Testing
Batch 1: Used frozen spinach without squeezing dry. The moisture from the spinach made the filling loose. By the time the chicken came out of the oven, the filling had partially liquefied and leaked through the toothpick gaps. Squeezing the spinach completely dry in a kitchen towel before mixing fixed this permanently.
Batch 2: Overstuffed 4 tablespoons per breast. The pocket opening forced itself wider during baking as the filling expanded with heat. Two breasts lost filling entirely by the 15-minute mark. Reducing to 2 to 3 tablespoons solved the problem.
Batch 3: Skipped the sear, baked directly at 400°F. The chicken cooked through correctly and the filling stayed in. But the exterior was pale and flat-looking presentable but not impressive. Adding the sear step on the next batch produced the golden exterior that made the dish look and taste restaurant-quality.
Common Mistakes Quick Summary
- Using frozen spinach without squeezing dry → filling turns watery and leaks
- Overstuffing past 3 tablespoons → pocket forces open during baking
- Cutting pocket all the way through → breast splits into two pieces
- Skipping the sear → pale, flat-looking exterior with less flavor
- Using shredded cheese as the only filling → leaks in most batches
- Not counting toothpicks → finding one on a plate mid-meal
- Pulling at wrong temperature → check the meat, not the filling
Cheese Guide for Stuffed Chicken Breast
| Cheese | Meltability | Leaking Risk | Best Use |
|---|---|---|---|
| Cream cheese | Creamy, stable | Very low | Primary filling base |
| Mozzarella | Stretchy, melts well | Medium if primary | Mixed into cream cheese |
| Goat cheese | Creamy, tangy | Low | Substitute for cream cheese |
| Parmesan | Umami depth, less melt | Very low | Added to filling for flavor |
| Brie | Rich, very creamy | Higher | Special occasion version |
| Cheddar | Good flavor, some oil | Medium | Works in filling, not ideal alone |
Pro Tips
- Cream cheese is the secret to filling that stays inside. It binds the other ingredients and does not release liquid the way shredded cheese does.
- Squeeze frozen spinach completely dry. Any residual moisture makes the filling loose and increases leaking risk significantly.
- 2 to 3 tablespoons of filling per breast not more. The pocket needs room to close and the filling needs room to expand slightly with heat.
- Sear first every time. Six extra minutes of total effort, dramatic difference in appearance and flavor.
- Count toothpicks in and count them out. Three toothpicks per breast going in, three coming out before serving.
Variations
Sun-Dried Tomato and Basil: Add 2 tbsp chopped sun-dried tomatoes and 1 tbsp fresh basil to the cream cheese filling. Bright, slightly sweet, pairs well with pasta.
Buffalo Style: Replace spinach with ¼ cup buffalo sauce mixed into the cream cheese. Add crumbled blue cheese. Bold and crowd-pleasing.
Mushroom and Swiss: Sauté ½ cup diced mushrooms until moisture evaporates. Mix with cream cheese and shredded Swiss. Rich and earthy.
Bacon and Cheddar: Add 3 strips cooked and crumbled bacon and ¼ cup shredded cheddar to the cream cheese. Crowd favorite for casual dinners.
Pesto and Mozzarella: Replace garlic and parmesan with 2 tbsp basil pesto. Add extra mozzarella. Bright, herby, excellent with roasted tomatoes.
What to Serve With
- Best Baked Chicken Breast That Never Dries Out — simpler weeknight version when stuffing feels like too much
- Best Juicy Air Fryer Chicken Breast — faster option for busy nights
- Best Honey Garlic Chicken Thighs Stovetop — if you want dark meat instead
- Garlic butter pasta the pan juices from the sear become a sauce with 2 tbsp butter added
- Roasted asparagus bakes at 400°F alongside the chicken
- Simple arugula salad with lemon vinaigrette the bitterness cuts through the rich filling
Make Ahead and Freeze Guide
Make ahead (same day): Stuff and secure the breasts up to 4 hours before cooking. Refrigerate uncovered on a plate. The exterior dries slightly in the fridge which actually helps the sear develop better. Cook directly from the fridge, adding 2 to 3 minutes to the bake time.
Freeze before cooking: Stuff and secure the breasts. Place on a parchment-lined sheet and freeze until solid (about 2 hours). Transfer to a freezer bag. Freeze up to 3 months. Cook from frozen at 375°F for 35 to 40 minutes skip the sear step when cooking from frozen.
Freeze after cooking: Cool completely, wrap individually, freeze up to 2 months. Thaw overnight in fridge. Reheat in oven at 325°F covered with foil for 15 to 18 minutes.
Storage and Reheating
Fridge: Up to 3 days in an airtight container.
Reheat (oven): 325°F covered with foil for 12 to 15 minutes. Low temperature prevents the chicken from tightening and drying out during reheating.
Reheat (microwave): Cover with damp paper towel. 50% power in 60-second intervals. The filling reheats well the chicken exterior softens but the dish is still very good.
Do not reheat in air fryer the cream cheese filling can overheat and separate. Oven reheating is more gentle and produces better results.
Best Stuffed Chicken Breast — Easy Weeknight Winner
Ingredients
Equipment
Method
- Make the Filling Combine all filling ingredients in a bowl. Mix until evenly combined. Filling should hold together not runny. Taste and adjust seasoning. If using frozen spinach, squeeze completely dry before adding.
- Cut the Pockets Place breast smooth side up on cutting board. Insert sharp paring knife horizontally into thickest point. Push three-quarters through stop ½ inch from opposite side, top, and bottom. Move knife gently to widen pocket without cutting through. Use a finger to widen further from inside.
- Fill and Secure Spoon 2 to 3 tablespoons filling into each pocket. Press gently toward the back. Close opening and insert 2 to 3 toothpicks at 1-inch intervals. Count toothpicks. Season exterior with olive oil, salt, pepper, paprika, garlic powder.
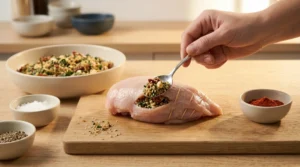
- Sear Heat oven-safe skillet over medium-high heat. Add thin film of oil. Place stuffed breasts smooth side down. Sear 3 to 4 minutes until deep golden. Flip carefully and sear second side 2 minutes.

- Bake Transfer skillet to preheated 400°F oven. Bake 18 to 22 minutes until internal temperature reads 165°F at thickest part of chicken per USDA safe minimum cooking temperatures. Check at 18 minutes.
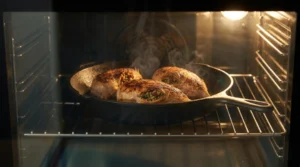
- Rest and Remove Tooth picks Rest 5 minutes. Remove all toothpicks confirm count matches. Slice diagonally to reveal filling. Serve immediately.
Notes
Nutrition Info (per serving, 1 stuffed breast)
| Nutrient | Amount |
|---|---|
| Calories | 378 |
| Protein | 42g |
| Fat | 19g |
| Carbohydrates | 4g |
| Sodium | 520mg |
| Fiber | 0g |
| Sugar | 1g |
Nutrition information is an estimate and may vary depending on the ingredients and brands used. Data sourced from USDA FoodData Central.
FAQs
Q: How do I keep the filling from falling out of stuffed chicken breast?
A: Three things prevent it cut the pocket correctly (three-quarters through, not all the way), use cream cheese as the filling base (it binds rather than leaking), and do not overfill (2 to 3 tablespoons maximum). Secure with 2 to 3 toothpicks at the opening and the filling stays inside through the entire cook.
Q: How long does stuffed chicken breast take in the oven?
A: After a 3 to 4 minute sear on each side, bake at 400°F for 18 to 22 minutes. Internal temperature should reach 165°F at the thickest part of the chicken not the filling. Check at 18 minutes and adjust based on breast size. USDA safe minimum cooking temperatures
Q: Can I make stuffed chicken breast ahead of time?
A: Stuff and secure the breasts up to 4 hours ahead and refrigerate. Cook directly from the fridge, adding 2 to 3 minutes to the bake time. For longer advance prep, freeze before cooking stuffed breasts freeze well for up to 3 months and can be baked directly from frozen at 375°F for 35 to 40 minutes.
Q: Why does my stuffed chicken breast filling keep leaking out?
A: Usually one of three reasons the filling was too wet (frozen spinach not squeezed dry), too much filling was used (more than 3 tablespoons), or the pocket was cut too wide or too close to the edge. Use cream cheese as the base, squeeze any moisture from the spinach, and limit filling to 2 to 3 tablespoons per breast.
Q: Should I sear stuffed chicken breast before baking?
A: Yes the 6 minutes of searing adds significant color and flavor to the exterior that baking alone does not achieve. The golden crust from the sear also helps hold the shape of the breast during the longer bake. Testing bake-only vs sear-then-bake produced noticeably different results in appearance and flavor.
Q: What is the best cheese for stuffed chicken breast?
A: Cream cheese as the primary filling base it stays creamy, binds other ingredients, and does not leak. Shredded mozzarella mixed into the cream cheese adds stretch. Parmesan adds depth. Avoid using shredded cheese alone as the filling it releases liquid as it melts and is much more likely to leak out during baking.
About the Author
Written by a home cook and recipe developer who has tested stuffed chicken breast methods across multiple filling types, cooking approaches, and cheese combinations. Every recommendation in this article reflects real kitchen testing.
Would I Make This Again?
Every time there is a reason to make dinner feel like an occasion without actually spending occasion-level time on it.
The batch that settled the cream cheese question was the side-by-side test with shredded mozzarella. Both tasted good. Only one looked right when sliced. The cream cheese version has a clean, restaurant-style cross-section that the shredded cheese version never quite achieved.
Stuffed chicken breast easy enough for a Tuesday, impressive enough for guests. That combination earns a permanent spot in the rotation.
Final Note
Impressive presentation, genuinely easy method, filling that stays inside cream cheese base, correct pocket depth, 2 to 3 tablespoons maximum, sear first, bake at 400°F, pull at 165°F.
That sequence works every time. The toothpick count is the only thing to keep track of.
Made this? Save this recipe for your next dinner that needs to look impressive without being complicated and drop a comment below. Which filling variation did you try first? Pin this before your next dinner party.


One Comment